• About
  • Fan Favorites
  • Contact
  • Shop
The Schmidty Wife

The Schmidty Wife

real fresh food for real fun families

  • All Recipes
  • Weeknight Dinners
    • 30 Minutes or Less
    • Skillet
    • Casserole
    • Sheet Pan
    • Main Dish
    • Crockpot
  • Browse By Type
    • Pasta
    • Mexican
    • Asian
    • Fun Foods
    • Leftovers
    • Tacos
  • About
  • Fan Favorites
  • Contact
  • Shop
  • All Recipes
  • Weeknight Dinners
    • 30 Minutes or Less
    • Skillet
    • Casserole
    • Sheet Pan
    • Main Dish
    • Crockpot
  • Browse By Type
    • Pasta
    • Mexican
    • Asian
    • Fun Foods
    • Leftovers
    • Tacos

Quick & Easy Skillet Taco Chicken

September 10, 2019 by Lauren Schmidt 3 Comments

Skip the tortilla, this skillet chicken is the taco night you never knew you needed. Chicken breast is seasoned with taco seasoning, cooked quick in the skillet with taco sauce & cheese, and topped with all of your favorite taco toppings for a quick and easy dinner! This Skillet Taco Chicken Breast Recipe will be on repeat in your house weekly!

This post may contain Affiliate Links.

Taco Chicken Breasts in a cast iron skillet with lettuce, tomatoes, sour cream, and black olives

Skillet Taco Chicken Breast

Did taco night just become 100% easier? YES, yes it did with this quick and easy taco chicken breast done in the skillet. 

Cook up taco seasoned chicken breasts quickly along with taco sauce and cheese in just minutes and dinner is on the table.

Skip the tortillas and top your skillet taco chicken with your favorite taco toppings and dinner is served. 

Taco Chicken Bake

This is done in a similar style to all of my chicken bake recipes but this recipe is even more awesome because it is about 3 times faster when done on the stovetop in a skillet. 

I chose to do this recipe on the skillet because with the coating of taco seasoning, having a sear on the breast is just so much more delicious!!!

I tried this recipe in both the oven and on the skillet. Skillet won hands down, it was extremely better for this dish!

Similar to my Easy Southwest Chicken recipe that uses a dry rub seasoning, it is easy to prep, cooks fast, and clean up is simple as well. 

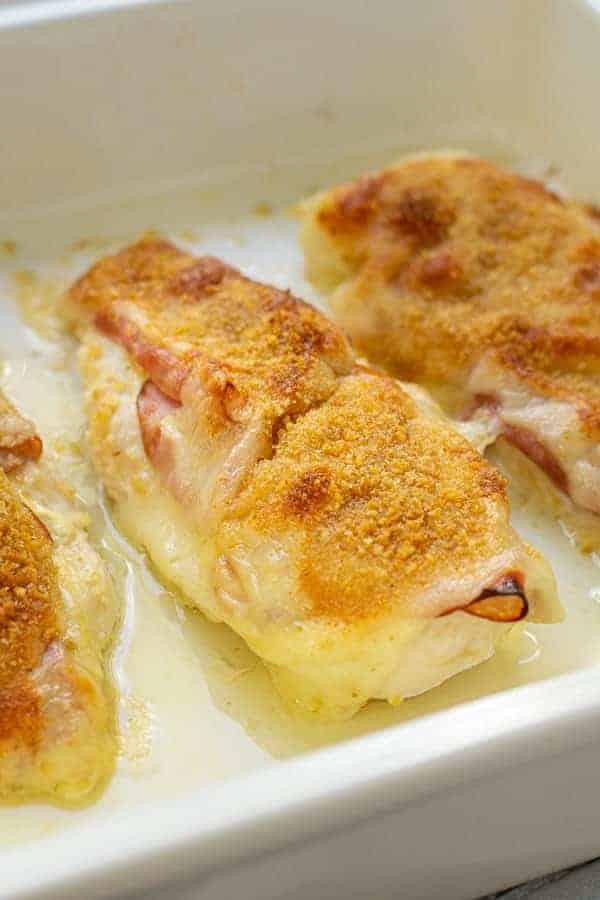
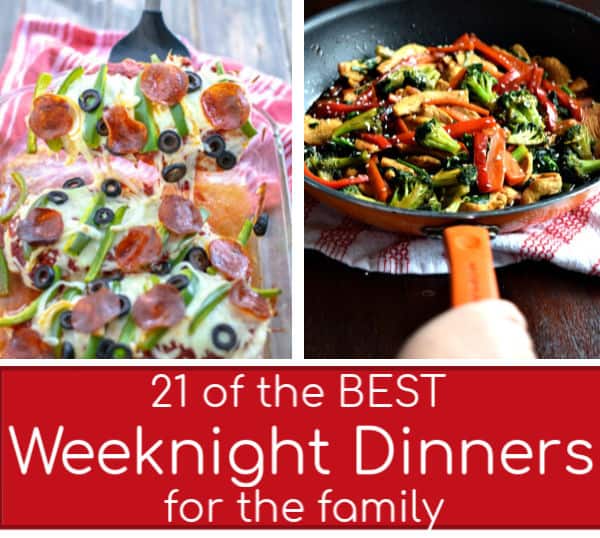
If you are looking for a chicken option in the oven instead check out my Supreme Pizza Chicken Bake, Spinach Artichoke Chicken Bake, or my Chicken Cordon Bleu Chicken Bake. 

ingredients need to make skillet taco chicken breast recipe

How to Make Healthy Chicken Taco Skillet

Start by preparing the chicken, I like to use close to proper portion sizes when I use chicken breast in my recipes. So that means you will want a chicken cutlet opposed to a full size chicken breast. Most chicken breasts are about double a proper proportion, so the best way to solve that problem is to turn one large chicken breast into 2 cutlets. 

Make a cutlet by carefully cutting the chicken in half, resulting in 2 smaller cutlets. These cutlets will be close to 6-8 ounces depending on the starting size of your chicken breast. So for this recipe you will want two chicken breasts resulting in 4 chicken cutlets. 

If all of this is confusing of course there is two things you can do. First you can buy chicken breasts that are pre-portioned to a proper portion. Or second just use the full chicken breasts but note that the cook time will change since the breast are probably larger, which in turn might change the outcome of the dish.

Once you have your cutlets you will prepare them by coating both sides with the taco seasoning until completely covered. If you are in need of an awesome taco seasoning, check out my Homemade Taco Seasoning.

chicken cutlet coated in taco seasoning before being placed on the skillet

Next prepare your skillet, add the oil to a large skillet and heat on the stovetop over medium-high heat until oil is shimmering and hot.

Add the seasoned chicken cutlets in a single layer in the skillet, try to avoid them overlapping and touching. Cover with a lid and cook for 4 minutes.

Now flip the chicken, recover, and cook 3 minutes.

After 3 minutes, add 1 tablespoon of taco sauce to the top of each of the chicken cutlets followed by 1/4 cup of cheese to the tops of each.

Recover and cook 1 more minute or until chicken has an internal temperature of 165º F and cheese is all melty!

warm taco sauce and melty cheese on top of a chicken breast in a skillet fresh out of the oven

Remove from heat and let chicken rest 3-5 minutes. Transfer to plates and top each taco chicken cutlet with lettuce, tomatoes, sour cream, and black olives or whatever your favorite taco toppings are! 

three taco chicken breasts in a skillet covered in lettuce, cheese, tomatoes, and sour cream

Note for pictures I put the toppings on while the chicken was still in the skillet but for practically purposes it is easier to do once it is on the plate. 

I also like the pre-cut my children’s chicken before putting the toppings on to make it easier to eat. Plus then as a parent you don’t have to try to cut the chicken that is covered in taco toppings! 

What to serve with your Skillet Taco Chicken Breast?

  • I would recommend my super easy Slow Cooker Refried Beans
  • You can’t go wrong with Mexican Rice
  • Crispy Baby Potatoes or Frozen French Fries are also a delicious option
  • You can never go wrong with a healthy vegetable like my Oven Roasted Broccoli 
overhead shot of a taco chicken breast in a cast iron pan
close up of skillet taco chicken breast in a pan covered in taco toppings
Yield: 4 servings

Skillet Taco Chicken

Taco Chicken Breasts in a cast iron skillet with lettuce, tomatoes, sour cream, and black olives

Skip the tortilla, this skillet chicken is the taco night you never knew you needed. Chicken is seasoned with taco seasoning, cooked quick in the skillet, and topped with all of your favorite taco toppings for a quick and easy dinner!

Prep Time 7 minutes
Cook Time 8 minutes
Total Time 15 minutes

Ingredients

  • 4 chicken cutlets*
  • 1 tablespoon taco seasoning
  • 4 tablespoons taco sauce
  • 1 cup Mexican/taco blend shredded cheese
  • 1 tablespoon oil (any neutral oil)

Toppings:

  • shredded lettuce
  • diced tomatoes
  • sour cream (or greek yogurt)
  • black olives

Instructions

  1. Prepare the chicken cutlets by coating both sides with the taco seasoning until completly covered.
  2. Add oil to a large skillet and heat on the stovetop over medium-high heat until oil is shimmering and hot.
  3. Add chicken cutlets in a single layer in the skillet, try to avoid them overlapping and touching. Cover with a lid and cook 4 minutes.
  4. Flip chicken, recover and cook 3 minutes. After 3 minutes, add 1 tablespoon of taco sauce to the top of each of the chicken cutlets followed by 1/4 cup of cheese to the tops of each. Recover and cook 1 more minute or until chicken has an internal temperature of 165º F and cheese is melted.
  5. Let chicken rest 3-5 minutes then transfer to serving plates. Top each taco chicken cutlet with lettuce, tomatoes, sour cream, and black olives.

Notes

*2 large chicken breasts cut in half to create 4 proper proportions

Recommended Products

As an Amazon Associate and member of other affiliate programs, I earn from qualifying purchases.

  • Lodge 12 Inch Pre-Seasoned Cast Iron Skillet
    Lodge 12 Inch Pre-Seasoned Cast Iron Skillet
  • Thermapen ONE
    Thermapen ONE

Nutrition Information:

Yield:

4

Serving Size:

1 chicken cutlet

Amount Per Serving: Calories: 442Total Fat: 22gSaturated Fat: 8gTrans Fat: 0gUnsaturated Fat: 12gCholesterol: 177mgSodium: 1707mgCarbohydrates: 21gFiber: 2gSugar: 4gProtein: 38g

Nutritional data is automated, final nutritional information will depend on ingredients used and any changes made.

Did you make this recipe?

Please leave a comment below on the blog or share a photo with me tag @the_schmidty_wife! Can't wait to see what you made!

© Lauren Schmidt
Cuisine: American

And make sure you are following me on Instagram, Pinterest, and Facebook for all the latest recipes!

Peace & Love

Lauren, The Schmidty Wife

P.S. Looking for more dinner recipes? Check out my Slow Cooker Chipotle Pineapple Carnitas or my Black Bean Nachos. 

Easy Chicken Cordon Bleu Bake in the Oven

September 5, 2019 by Lauren Schmidt 14 Comments

This easy Chicken Cordon Bleu Bake recipe is healthy, easy, and baked in the oven to make the perfect weeknight version of this classic dish.  Done casserole/open faced style so prep is easy but all the delicious flavors you still love. With just a few simple ingredients this Chicken Cordon Bleu Bake is ready to eat in just about 30 minutes, it’s everything you want in a lightened up comfort food dinner! 

This post may contain Affiliate Links.

Close up of a chicken cordon bleu baked chicken in a casserole dish.

Chicken Cordon Bleu Bake

We all know I love my chicken bakes here on The Schmidty Wife, I mean lets try to imagine a world without some of my most popular chicken bakes, my Supreme Pizza Chicken Bake or my Spinach Artichoke Chicken Bake. So I was literally in the middle of telling a friend that I had hit a wall on what my next chicken bake should be when Chicken Cordon Bleu popped in my head, it was destiny. 

So I changed the meal plan that very week and started development on this AMAZING Chicken Cordon Bleu Bake. 

Easy Chicken Cordon Bleu

Just like my other chicken bakes I had requirements. This dish had to be 

  1. easy
  2. healthy, or at least healthier than a traditional chicken cordon bleu
  3. simple (and not too many) ingredients 

So because chicken cordon bleu should be creamy I opted to to start with a simple yogurt sauce just like I had made for chicken before.

The sauce consists of 4 easy ingredients, and that is only 4 if you count salt & pepper as ingredients, so really only 2. Plain yogurt and dijon mustard. 

The sauce goes over top the chicken and then is covered by slices of ham and Swiss cheese. 

The bake is than topped with just enough breadcrumbs to give it that breaded crunch you want the dish to have. Tossed in the oven and dinner is done!

all the ingredients laid out for the chicken cordon bleu bake recipe

Is this Chicken Cordon Bleu Healthy?

This answer is so relative.

So I am going to say this dish is definitely healthier than traditional Chicken Cordon Bleu. Most traditional recipes are dripping with butter, flour, sometimes even preservative filled creamy soup bases, you won’t find that here.

So because this recipes leaves out flour & butter and subs in plain yogurt, uses minimum breadcrumbs, and minimal oils I would confidently call this recipe the lightened up version. 

When looking at estimated calories this dish will be about half the amount of calories as a traditional cordon bleu and guess what Low-Carb too! 

You could even swap out traditional breadcrumbs here for gluten-free variety to fit your diet if needed.

So overall I guess we are calling this Chicken Cordon Bleu Bake healthy!!

dish with some of the chicken cordon bleu left and a plate with a chicken cordon bleu and a salad

How to make Chicken Cordon Bleu in Oven

Start by preheating the oven to 400ºF.

First prep sauce for the bake. In a mixing bowl combine yogurt, mustard, and a dash of salt & pepper. Stir to combine.

a series of pictures showing how the sauce for the chicken is made

As far as the chicken goes a big thing I push in these chicken bakes is portion size. So you will want a chicken cutlet about 6-8 ounces in size, which yes can be hard to judge especially if you don’t really know what that means…

1 pound is 16 ounces. Half of 16 is 8 (if only my math teacher could see me now…), so you will want in total about 2 pounds of chicken to make 4 cutlets.

This doesn’t have to be exact but what I have noticed at the grocery stores is that one chicken breast is about one pound, not always but close. So grab a pack of two breasts and cut them in half vertically to make four cutlets for this dish. 

If all of this is confusing of course there is two things you can do. First you can buy chicken breasts that are pre-portioned to a proper portion. Or second just use the full chicken breasts but note that the cook time will change since the breast are probably larger, which in turn might change the outcome of the dish. 

Now that we have chicken math out of the way lets continue with the recipe. 

In a 9×13 baking dish lay the chicken cutlets down in an even layer. Take the sauce and evenly distribute it between the pieces of chicken and spread the sauce over the tops of each of the cutlets.

steps 1 to 4 shown, sauce being put on the chicken and ham being topped on the chicken bake

On top of the sauce evenly lay the slices of the ham on each of the pieces of chicken, folding the slices of ham to fit the chicken as needed.

Do the same thing for the Swiss cheese.

I noticed that 2 slices of ham and 1 1/2 slices of Swiss cheese was the perfect amount to cover the chicken for the brands I used but the deli might do it differently where you are so adjust if needed. 

With a spoon evenly distribute the bread crumbs on top of the cheese.

Now to make the breadcrumbs crunchy use a spray oil to lightly spray the tops of the breadcrumbs with oil. It doesn’t have to be very much at all but just enough to lightly cover the breadcrumbs. If you skip this step you won’t see a super crunchy breading in you finished dish. I like to use this PAM Spray Pump Avocado Oil Cooking Spray. 

steps 5 to 8 shown in order, placing the cheese and bread crumbs and the fully baked dish

Transfer the dish to the oven and bake 25 minutes or until the thickest part of the chicken reads 165ºF on a meat thermometer. Let rest 3-5 minutes before serving.

What is Chicken Cordon Bleu Served With?

I find that anything with veggies is great with this Chicken Cordon Bleu Bake.

  • Salads are the perfect side. Try my Shaved Brussel Sprout Salad or my Roasted Pear & Pecan Salad
  • Roasted or steamed veggies. Try my Oven Roasted Broccoli or my Crispy Baby Potatoes 
  • Mashed Potatoes or Mashed Cauliflower. Try my Garlic Mashed Cauliflower
a serving piece holding a baked chicken cordon bleu
a chicken cordon bleu chicken breast sitting on a teal plate with a side salad
3 chicken cordon bleu in a baking dish with a serving utensil

My family absolutely has devoured this every single time I have made it, even my little non-meat eater has emptied his plate!

As funny as it is, on its own kids might not be a huge fan of dijon mustard or Swiss cheese. But something about combining it all works some magic that has even this pickiest eaters gobbling this down! 

You might also like:

  • Easy Pesto Chicken Bake
  • Greek Chicken Bake
  • Baked General Tso Chicken
  • The Easiest Taco Chicken
  • Easy Southwest Chicken
  • 20 Minute Chicken Stir Fry
Yield: 4 servings

Chicken Cordon Bleu Bake

Close up of a chicken cordon bleu baked chicken in a casserole dish.

This easy Chicken Cordon Bleu Bake recipe is healthy, easy, and baked in the oven to make the perfect weeknight version of this classic dish.  Done casserole/open faced style so prep is easy but all the delicious flavors you still love. With just a few simple ingredients this Chicken Cordon Bleu Bake is ready to eat in just about 30 minutes, it's everything you want in a lightened up comfort food dinner! 

Prep Time 10 minutes
Cook Time 25 minutes
Total Time 35 minutes

Ingredients

  • 4 (6-8oz) chicken breast cutlets*
  • 4 tablespoons plain yogurt
  • 1 tablespoon dijon mustard
  • salt & pepper
  • 8 slices deli ham
  • 6 slices deli Swiss cheese
  • 2 tablespoons plain breadcrumbs
  • spray oil

Instructions

  1. Preheat oven to 400ºF. Prep sauce for the bake, in a mixing bowl combine yogurt, mustard, and a dash of salt & pepper. Stir to combine.
  2. In a 9x13 baking dish lay chicken cutlets down in an even layer. Take the sauce and evenly distribute it between the pieces of chicken and spread the sauce over the tops of each of the cutlets.
  3. On top of the sauce evenly lay the slices of the ham on each of the pieces of chicken, followed by the cheese.
  4. With a spoon evenly distribute the bread crumbs on top of the cheese. To make the breadcrumbs crunchy use a spray oil to lightly spray the tops of the breadcrumbs with oil.
  5. Transfer to the oven and bake 25 minutes or until the thickest part of the chicken reads 165ºF on a meat thermometer. Let rest 3-5 minutes before serving.

Notes

*2 large chicken breasts cut in half to create 4 proper proportions

I found that 1 1/2 pieces of cheese & 2 slices of ham was the perfect amount to top each piece of chicken but sizes can range on cheese & meat slices so adjust if needed!

Recommended Products

As an Amazon Associate and member of other affiliate programs, I earn from qualifying purchases.

  • PAM Spray Pump Olive Oil Cooking Spray
    PAM Spray Pump Olive Oil Cooking Spray
  • Thermapen ONE
    Thermapen ONE
  • 9x13 Lodge Stoneware Baking Dish
    9x13 Lodge Stoneware Baking Dish

Nutrition Information:

Yield:

4

Serving Size:

1

Amount Per Serving: Calories: 294Total Fat: 17gSaturated Fat: 9gTrans Fat: 0gUnsaturated Fat: 6gCholesterol: 92mgSodium: 809mgCarbohydrates: 8gFiber: 1gSugar: 1gProtein: 27g

Nutritional data is automated, final nutritional information will depend on ingredients used and any changes made.

Did you make this recipe?

Please leave a comment below on the blog or share a photo with me tag @the_schmidty_wife! Can't wait to see what you made!

© Lauren Schmidt
Cuisine: American

And make sure you are following me on Instagram, Pinterest, and Facebook for all the latest recipes!

Peace & Love

Lauren, The Schmidty Wife

One Pan Baked Salmon & Broccoli Dinner

August 20, 2019 by Lauren Schmidt 5 Comments

This Baked Salmon and Broccoli is the perfect easy and healthy weeknight dinner that the whole family will enjoy! Simple to prep with only 4 ingredients and ready in under 30 minutes this Sheet Pan Salmon Dinner will be the next meal added to your regular rotation.

This post may contain Affiliate Links.

Forkful of baked salmon with broccoli on a sheet pan.

Sheet Pan Salmon

One of the simplest, easiest, and healthiest weeknight dinners you can make for your family! Baked Salmon and Broccoli is literally a lifesaver in my house. So simple to throw together with the easiest of ingredients and it is ready to eat in under 20 minutes. 

You basically just need salmon and broccoli, plus a few flavors like butter and lemon and you are ready to rock. 

One of the things I love about this recipe is that you actually want to put the food into a cold oven, which is prefect for when you are in a rush to get dinner on the table. 

So get ready to learn how to make the BEST Sheet Pan Salmon Dinner and pretty soon it will be on the regular dinner rotation at your house. 

What do I need for Baked Salmon and Broccoli

Foremost you need salmon. I prefer to get my salmon fresh caught from the grocery store and in one large fillet. While that is what I prefer, smaller individual fillets work just as well. You can also use frozen salmon that is thawed. 

Broccoli, you can buy heads to cut up yourself or buy pre-cut florets. Either way you can’t tell the difference 😉

And a side note on the broccoli, a lot of times when I make this I make it the same way I make my Oven Roasted Broccoli Recipe. I give it a toss in nutrition yeast. This of course isn’t necessary but I thought I would point it out as an option. 

Butter! I think butter tastes way better on fish but if you are in a pinch you can use a drizzle of olive oil. The butter works best in the recipe if it is in cold pieces to place on top of the salmon. 

A lemon. In my opinion lemon pairs perfectly with salmon, so I slice one up and throw the slices on top of the fish, it gives the salmon that extra flavor without being over powering. 

Along with salt and pepper as a final flavoring for the fish.

As far as kitchen tools you will need a Sheet Pan and an oven, SO SIMPLE!

ingredients needed for the sheet pan salmon dinner bake

How To Make Baked Salmon and Broccoli 

The best thing about this recipe is that you don’t want to preheat the oven, which is perfect for those nights when you don’t have time for the oven to preheat. Putting the fish into a cold oven results in an even and juicy bake!

I will note for easier clean up you can use a piece of aluminum foil to cover the pan. OR if you have family members who don’t like food and flavors mixing, use a piece of foil for under the fish and gently fold up to create a little barrier between the broccoli. 

So to start you will add broccoli florets to a sheet pan. Drizzle with enough olive oil to coat and toss. Spread broccoli to the outside of the pan to make room for the salmon.

Add salmon fillet(s) to the center of the sheet pan, surronded by the broccoli. Evenly add lemon slices and butter to the top of the salmon. Salt & pepper the whole pan to taste.

overhead view of raw broccoli and salmon on a sheet pan ready for the oven

Transfer the sheet pan to the cold oven. Heat oven to 400ºF. Bake 20 minutes until salmon is fully cooked or flakes easily apart with a fork, serve immediately.

before and after photos of the salmon and broccoli on a sheet pan with lemons and butter

Side Dishes for Sheet Pan Salmon

So the nice thing about this dinner it is essentially one pan but it often could use just one more simple side:

• I love a bagged salad with this meal because it is EASY

• Rice or other grains like quinoa make a good side

• Mashed or baked potatoes would also be lovely 

raw salmon on a sheet pan ready to be put in the oven
salom and broccoli just baked on a single sheet pan with lemons
overhead image of sheet pan salmon dinner
bite of cooked salmon on a fork resting on a sheet pan of salmon and broccoli

You might also like:

  • Oven Baked Shrimp
  • Sheet Pan Cranberry Chicken Sausage
  • Sheet Pan Gnocchi
  • Sheet Pan Balsamic Chicken with Vegetables
Yield: 4 servings

Baked Salmon and Broccoli

Forkful of baked salmon with broccoli on a sheet pan.

an easy full salmon dinner in under 30 minutes, fresh and healthy for the whole family to enjoy

Prep Time 5 minutes
Cook Time 20 minutes
Total Time 25 minutes

Ingredients

  • 1 to 1.5 pounds salmon (skin on or off)
  • 3 broccoli crowns, cut into florets
  • 3-4 tablespoons butter, cold
  • 3 teaspoons olive oil
  • 1 lemon, sliced thin
  • salt & pepper

Instructions

  1. Add broccoli florets to a sheet pan, drizzle with olive oil and toss to coat. Spread broccoli to the outside of the pan to make room for the salmon.
  2. Add salmon fillet(s) to the center of the sheet pan, surronded by the broccoli. Evenly add lemon slices and butter to the top of the salmon. Salt & pepper the whole pan to taste.
  3. Transfer to a cold oven. Heat oven to 400ºF. Bake 20 minutes until salmon is fully cooked/flakes easily apart with a fork, serve immediately.

Notes

For easy clean up I like to cover my sheet pan in aluminum foil for this meal.

By using the sheet pan as a place to toss the broccoli in the oil it also lightly greases the pan to keep the fish from sticking.

Recommended Products

As an Amazon Associate and member of other affiliate programs, I earn from qualifying purchases.

  • Nordic Ware Baker's Sheet Pan
    Nordic Ware Baker's Sheet Pan

Nutrition Information:

Yield:

4

Serving Size:

1

Amount Per Serving: Calories: 384Total Fat: 29gSaturated Fat: 11gTrans Fat: 0gUnsaturated Fat: 16gCholesterol: 102mgSodium: 250mgCarbohydrates: 5gFiber: 2gSugar: 1gProtein: 26g

Nutritional data is automated, final nutritional information will depend on ingredients used and any changes made.

Did you make this recipe?

Please leave a comment below on the blog or share a photo with me tag @the_schmidty_wife! Can't wait to see what you made!

© Lauren Schmidt
Cuisine: American

If you enjoyed this recipe or any of my others let me know by using #theschmidtywife on social media!

And make sure you are following me on Instagram, Pinterest, and Facebook for all the latest recipes!

Peace & Love

Lauren, The Schmidty Wife

Weeknight Personal Pizza Recipe The Family Will Love

August 15, 2019 by Lauren Schmidt 6 Comments

Today’s post is sponsored by Barlean’s, Hamilton Beach, and Rhodes Bread as well as Crispy Green, and The Spice House. However, all opinions are my own. #ad #Back2School

This weeknight Personal Pizza Recipe is a breeze to make. With only 4 ingredients you can make homemade pizza in less time than it takes to cook a frozen pizza. This recipe for personal pizza is sure to delight the whole family on a weeknight, make your individual pizzas tonight!

This post may contain Affiliate Links.

Close up of individual pizza on a plate with vegetables perfect for a weeknight dinner.

Homemade Personal Pizza

Do I share too many pizza recipes? The correct answer is NO but I feel like between my How to Make Grilled Pizza and Supreme Pizza Chicken Bake that have been published lately maybe a third new pizza recipe is going overboard. But what the heck everyone wants an incredibly easy weeknight pizza recipe right!?

These Weeknight Individual Pizzas are a breeze to make thanks to Rhodes Bread Frozen Dinner Rolls. Turns out that frozen dough makes the best crust for a personal pizza recipe. 

First thing first I think that probably everybody should always keep a bag of Rhodes Bread frozen dinner  rolls in their freezer. Not only are they affordable, keep well, and taste amazing you can use them for endless possibilities. One of these possibilities being an amazing Personal Pizza Recipe. 

So these pizzas are so easy to make they only take 4 ingredients and can be on the table in 20 minutes. The hardest part of this recipe is making sure that your dough has enough time to thaw out, luckily it is easy enough to do, it is the remembering that might be the problem 😉

So lets see how easy these are to make and then don’t forget to enter the #back2school giveaway below the recipe! Giveaway is now closed, thanks!

Recipe for Personal Pizza

First off the frozen dough must be thawed for pizzas to be made. Remove 8 rolls from the freezer and place on a plate, cover with plastic wrap. At room temperture let rolls thaw at least 3 hours OR in the fridge let rolls thaw 8-10 hours (aka take out in the morning and leave in the fridge). If thawing in the fridge they will work best if you give them 30 minutes to an hour before using to sit on the counter and come to room temperature but it isn’t necessary.

The other ingredients you will need are pizza sauce, like my 5 Minute Pizza Sauce. Sliced provolone or mozzarella cheese, and pepperoni! Simple right!?

the four ingredients needed to make the personal pizza recipe

Once your dough is ready preheat oven to 400º F. Lightly grease a sheet pan with spray oil.

Gently take 2 of the thawed slightly risen rolls and work together into a pizza crust, stretching out carefully with your hands to make a crust about 4-5 inches in diameter. Place on greased sheet pan. Continue the process until all 4 crusts are made and placed on the sheet pan.

Divide sauce over crust and spread out evenly. Top with a slice of cheese on each pizza followed by your pepperoni.

Transfer sheet pan to oven and let it cook 11-13 minutes until dough is slightly golden and cheese is bubbly. Let rest slightly before serving.

dough for pizzas being made with sauce and cheese
before and after of putting the personal pizza recipe in the oven

What to serve with Weeknight Personal Pizzas

  • My favorite thing to serve is cut up veggies with my Healthy Yogurt Ranch Dip
  • A simple side salad or bagged salad from the grocery
  • my Oven Roasted Broccoli would be delicious 

Any way you serve it the family will love it! Trust me! My husband told me the worst thing about this recipe is that I only made him 1 pizza 😉

freshly baked pepperoni personal pizza on a sheet pan
pepperoni personal pizza on a plate with vegetables
kid hand reaching for a personal pizza off a plate
adult hand grabbing a personal pizza off of a white plate
Yield: 4 individual pizzas

Weeknight Personal Pizzas

Close up of individual pizza on a plate with vegetables perfect for a weeknight dinner.

easy homemade personal pizzas are a breeze to make using frozen dough and simple ingredients to get dinner on the table fast

Prep Time 9 minutes
Cook Time 11 minutes
Total Time 20 minutes

Ingredients

  • 8 Rhodes Frozen Dough Dinner Rolls*
  • 1/4 cup pizza sauce
  • 4 slices provolone or mozzarella cheese
  • 16 slices pepperoni

Instructions

Frozen dough must be thawed for pizzas to be made. Remove 8 rolls from the freezer and place on a plate, cover with plastic wrap. At room temperture let rolls thaw at least 3 hours OR in the fridge let rolls thaw 8-10 hours (aka take out in the morning and leave in the fridge). If thawing in the fridge they will work best if you give them 30 minutes to an hour before using to sit on the counter and come to room temperature.

  1. Preheat oven to 400º F. Lightly grease a sheet pan with spray oil.
  2. Gently take 2 of the thawed slightly risen rolls and work together into a pizza crust, stretching out carefully with your hands to make a crust about 4-5 inches in diameter. Place on greased sheet pan. Continue the process until all 4 crusts are made and placed on the sheet pan.
  3. Divide sauce over crust and spread out evenly. Top with a slice of cheese on each pizza followed by 4 pepperonis.
  4. Transfer sheet pan to oven and let it cook 11-13 minutes until dough is slightly golden and cheese is bubbly. Let rest slightly before serving.

Notes

*As explained in the intro paragraph, you'll want to make sure the dough is fully thawed and if it possible slightly risen. So as easy as this recipe is you do need just a little forthought to make sure the dough is thawed at the proper time.

Recommended Products

As an Amazon Associate and member of other affiliate programs, I earn from qualifying purchases.

  • Rhodes Bread Dinner Rolls
    Rhodes Bread Dinner Rolls

Nutrition Information:

Yield:

4

Serving Size:

1

Amount Per Serving: Calories: 300Total Fat: 15gSaturated Fat: 7gTrans Fat: 0gUnsaturated Fat: 7gCholesterol: 27mgSodium: 720mgCarbohydrates: 28gFiber: 2gSugar: 2gProtein: 14g

Nutritional data is automated, final nutritional information will depend on ingredients used and any changes made.

Did you make this recipe?

Please leave a comment below on the blog or share a photo with me tag @the_schmidty_wife! Can't wait to see what you made!

© Lauren Schmidt
Cuisine: American

#Back2School Recipe Inspiration

It’s hard to believe it’s already time to be talking about going back to school! It seems like summer just flew right by! To celebrate and help get you ready for this busy time, we’ve got loads of great back to school recipe ideas for you, along with an awesome giveaway.

For more amazing #Back2School recipes, please follow our #Back2School Pinterest board. Be sure to also check out my fellow bloggers participating all week long for more delicious dishes!

Blogghetti, Bowl Me Over, Cindy’s Recipes and Writings, Cheese Curd In Paradise, Cooking With Carlee, Doodlecraft, Everyday Eileen, Family Around the Table, Hezzi-D’s Books and Cooks, Juggling Act Mama, Karen’s Kitchen Stories, Mandatory Mooch, Palatable Pasttime, The Schmidty Wife, and Wendy Polisi.

#Back2School Giveaway

The giveaway is now closed, thanks!

The giveaway includes the following prizes:

  • Omega Pal’s Prize Pack from Barleans
  • 1 item (winner’s choice from featured products) from Hamilton Beach
  • Cookbook and coupons from Rhodes Bread
  • 4 six-pack bags of Crispy Fruit snacks (mixed flavors) from Crispy Green
  • Best Sellers Collection Gift Box from The Spice House
  • Freezable Lunch Bag + Mod Lunch Bento from PackIt

Official Rules and Conditions: One (1) winner will be chosen. Prize must be claimed within 48 hours of announcement or a new winner will be drawn. Open to US residents 18+ only. All entries will be verified. This giveaway is in no way associated with Facebook, Pinterest, Twitter, Instagram, Rafflecopter, or any other entity unless otherwise specified. Giveaway ends 08/21/2019. Enter using the widget below.

a Rafflecopter giveaway

If you enjoyed this recipe or any of my others let me know by using #theschmidtywife on social media!

And make sure you are following me on Instagram, Pinterest, and Facebook for all the latest recipes!

Peace & Love

Lauren, The Schmidty Wife

P.S. Looking for more weeknight recipes? Check out my 20 Minute Chicken Stir Fry or my Spinach Artichoke Chicken Bake. 

My Preschooler’s Favorite Dinners for Back to School Week + GIVEAWAYS!

August 12, 2019 by Lauren Schmidt 19 Comments

This post may contain Affiliate Links.

Pinterest Pin for A round up of dinners that preschooler's might like.

Today’s post is sponsored by Barlean’s, Hamilton Beach, and Rhodes Bread as well as Crispy Green, The Spice House, and PackIt. However, all opinions are my own. #ad #Back2School

This week we are celebrating #Back2School. Or in my case to school, for the first time… I will be sending my oldest, Archie off to preschool and this momma is a mess.

I am assuming it is a mom thing but I am completely broken that my little baby Archie is off to preschool, the next thing you know he is going to be driving, and then moving across country, having kids… you might as well call me grandma…

I tried to convince him to stay home with me, not kidding. This kid insisted that he was ready for school and has been asking if it is time for school every morning when he wakes up and talking about it non-stop. So who am I to hold him back from what he wants, even if it is slowly killing me. 

I guess it is only preschool, and only 4 days of week, and only in the afternoon but still…

Seriously, I am having a hard time with it. Can you tell? So I have been trying to mentally prepare myself and physically prepare as well. I have been working in the kitchen and around the house to make this into a smooth transaction. 

Since Archie is starting school for the first time I want to make the first week a little special for him so I am going to be making some of his favorite dinners from the blog and thought I would share those with you. They are all great weeknight options the whole family will love! Most are quick to prep and just as quick to cook, so hey maybe you should just copy these recipes for your first week back at school too. 😉

And after you check out his list don’t forget to scroll on below to read more about this weeks GIVEWAY! 

Archie's Favorite Weeknight Dinners

Crockpot Bolognese

Bolognese is just a fancy word for meat sauce to serve over spaghetti. But this meat sauce is special beacuse it is incrediebly easy to make in the slow cooker plus FULL of extra vegetables! All you have to do is get some spaghetti noddles made once its time to eat and viola dinner. Plus this makes a large batch which is perfect because Archie loves the leftovers for lunch the next day.

Korean Ground Turkey & Rice Bowls

Archie loves this recipe, ground turkey is flavored with a sweet yet savory korean inspired sauce and served over a bed of rice. The recipe takes about 15 minutes from start to finish which makes it a perfect weeknight meal the whole family will love.

Baked Chicken Nuggets with Hidden Quinoa

Archie is in preschool after all so what preschooler doesn't absoultely love chicken nuggets. And what parent doesn't love healthy quinoa hidden in thier kids easy to make homemade chicken nuggets? This is one of those recipes the whole family enjoys because we can each have out favorite sauce with it, mom loves buffalo, whicle archie loves his chicken nuggets with ketchup & honey.

Simple Vegetable Rice Soup

This is a simple and easy soup but so delicious and seriously everyone loves it! It is full with vegetables, delicious broth, and rice. Archie's favorite part is the carrots, he eats all of those out first and I think it is adorable!

Quick Easy Pork Fried Rice

Can you tell my kid is a big rice fan? Archie devours fried rice. This is quick to make with cheap cuts of pork and keeps great for lunches to next day if you have extras! 😉

And so in celebration of getting back to school I have teamed up with some other bloggers to celebrate the end of summer with a bang! Which means A TON of new recipes perfect for back to school and a GIVEAWAY! Thats right, we are giving away a great prize package, and you get to see these prizes in action throughout this week as we all share our recipes!

So check out the sponsors below and check out the giveaway!

I’ll be updating this post with my newest recipes all this week! Here:

• Breakfast Avocado Breakfast Sandwich

• Snack Time Tropical Energy Bites

• Dinner Weeknight Personal Pizzas

Meet the Recipe Sponsors

We are so thrilled to have Barlean’s, Hamilton Beach and Rhodes Bread sponsor our #Back2School week recipes! Read the info below and get to know them a little better.

Barlean’s

At Barlean’s, we believe people can make a difference in the world through ordinary purchases. We’re on a mission to make premium natural supplements and functional foods that feed the mind and body and using our profits to support outreach programs for people in need, both locally and around the world. We source high quality ingredients and treat everyone along our supply chain with care and respect – from the farmers who grow our ingredients, to our retailers and employees, to the people who use our products.

Hamilton Beach

Whether you’re shopping for a college student moving into their first apartment or looking for appliances to simplify your weekday meal prep, Hamilton Beach Brands is here to help with your #Back2School needs. Every aspect of your day is taken care of- from a hassle-free breakfast sandwich or a sustaining smoothie in the morning, to after school snack time made simple with the Proctor Silex Air Fryer, to ensuring their outfits are ready to go the next morning with the CHI Touch Screen Iron. Hamilton Beach Brands will make this year’s back to school transition easier than ever.

Close up on pair of young girl’s hands removing a healthy wholesome wholemeal bread ham sandwich from her lunch box during breaktime

Rhodes Bake-N-Serv®

Rhodes Bake-N-Serv® is a family business dedicated to producing home-baked quality frozen bread and roll dough, frozen sweet rolls and partially baked frozen rolls. Rhodes is produced in the heart of Wisconsin with its headquarters in Utah. Rhodes is devoted to helping our customers bake successfully. We offer versatile products at a great value with a no-fault guarantee.

Giveaway Sponsors:

In addition to these amazing sponsors, our giveaway winner will also receive prizes from Crispy Green, PackIt, and The Spice House. You’re going to love these awesome prizes!

Cripsy Green

Crispy Green is the #1 Freeze-Dried Fruit Snack in the U.S.! With no added sugar, additives or preservatives, Crispy Green’s Crispy Fruit snack line makes for the perfect snack for those back to school lunch boxes! Crispy Fruit is 100% pure fruit, nothing else!

PackIt

PackIt’s Freezable Lunch Bag folds up neatly to the size of a thick book. Throw the whole bag in the freezer overnight, to activate its built-in freezable gel. By morning, the walls of the bag will be completely frozen and ready to chill just like a fridge. The Mod Lunch Bento includes 3 removable dividers that wall off thick liquids and solids, letting you separate sensitive foods and create customized spaces each time.

The Spice House

The Spice House has been a purveyor of fine spices since 1957, grinding them in small weekly batches to retain freshness and enhance their flavor profiles.

#Back2School Recipe Inspiration

For more amazing #Back2School recipes, please follow our #Back2School Pinterest board. Be sure to also check out my fellow bloggers participating all week long for more delicious dishes!

Blogghetti, Bowl Me Over, Cindy’s Recipes and Writings, Cheese Curd In Paradise, Cooking With Carlee, Doodlecraft, Everyday Eileen, Family Around the Table, Hezzi-D’s Books and Cooks, Juggling Act Mama, Karen’s Kitchen Stories, Mandatory Mooch, Palatable Pasttime, The Schmidty Wife, and Wendy Polisi.

School and office supplies and apple on classroom table in front of blackboard. View with copy space

#Back2School Giveaway

The giveaway includes the following prizes:

  • Omega Pal’s Prize Pack from Barleans
  • 1 item (winner’s choice from featured products) from Hamilton Beach
  • Cookbook and coupons from Rhodes Bread
  • 4 six-pack bags of Crispy Fruit snacks (mixed flavors) from Crispy Green
  • Best Sellers Collection Gift Box from The Spice House
  • Freezable Lunch Bag + Mod Lunch Bento from PackIt

Official Rules and Conditions: One (1) winner will be chosen. Prize must be claimed within 48 hours of announcement or a new winner will be drawn. Open to US residents 18+ only. All entries will be verified. This giveaway is in no way associated with Facebook, Pinterest, Twitter, Instagram, Rafflecopter, or any other entity unless otherwise specified. Giveaway ends 08/21/2019. Enter using the widget below.

a Rafflecopter giveaway

If you enjoyed any of these recipes let me know by using #theschmidtywife on social media!

And make sure you are following me on Instagram, Pinterest, and Facebook for all the latest recipes!

Peace & Love

Lauren, The Schmidty Wife

21 Weeknight Dinner Ideas for the Family

July 25, 2019 by Lauren Schmidt Leave a Comment

Everyone with a family knows how important it can be to find a great weeknight dinner recipe! Here is a list of 21 of the best stovetop, oven, slow cooker, and pressure cooker weeknight dinner ideas for the family!

This post may contain Affiliate Links.

21 of the best weeknight dinners for the family

The BEST Weeknight Dinner Ideas for the Family

Life can be busy but we still all want to eat generally healthy right? So I have rounded up 21 of the most fresh weeknight dinners that are perfect for the whole family. 

For your convince I have divided the list into 4 sections; Stovetop, Oven, Slow Cooker, and Pressure Cooker. So no matter what your jam is you will find something on this list you’ll love! From chicken bakes, to Chinese fake-out, to weeknight ribs it is time to get your grub on!

Stovetop Recipes

Quick & easy skillet and stovetop dinner recipes.

20 Minute Chicken Stir Fry

In 20 minutes you will have a protien packed, veggie filled dinner to serve to the family! This chicken stir fry comes together quickly and is served over rice.

Sticky Orange Chicken Thighs

Turn a family pack of chicken thighs into a delicious dinner! A few simple ingredients make a delicious sticky orange sauce. Made in a cast iron these chicken thighs will be your new go-to dinner!

Photo Credit: www.acedarspoon.com

Mexican Pizza

Combine everyone's favorite foods, pizza and tacos with this super delicious Mexican Pizza. Made with simple ground beef and refried beans, this meal can be easily prepped ahead to get dinner on the table fast!

Photo Credit: www.beyondthechickencoop.com

Orange Chicken

Do you love Chinese take out but order it too much? No worries this easy Orange Chicken recipe will satisfy those Chinese food cravings, easy to throw together your family will ask for it again and again.

Korean Ground Turkey & Rice Bowls

More Asian inspiration, these turkey & rice bowls come together fast. Ground turkey is browned on the skillet and flavored with a super simple but flavorful sauce and served over rice! This dish can be on the table in as little as 15 minutes!

Oven Recipes

Turn on the oven and let dinner bake!

Supreme Pizza Chicken Bake Recipe Low Carb

All the flavor of the pizza you love but in a low carb no added sugar version. Chicken topped with simple homemade sauce, and piled high with cheese and vegetables, you will be ditching the take out and making this Supreme Pizza Chicken Bake Recipe on a regular basis!

Oven Baked Shrimp Recipe

This easy Oven Baked Shrimp Recipe creates succulent and delicious shrimp in under 10 minutes. So whether you are looking to make shrimp for an appetizer, for tossing on salads, pastas, and so much more you have come to the right place! The perfect way to do that is learning how to bake shrimp in the oven!

Photo Credit: blessherheartyall.com

6-Ingredient Honey Mustard Chicken Bake

A simple flavorful chicken bake with an easy and healthy homeade sauce. This dinner comes together fast without a lot of work (or dishes).

Healthy Spinach Artichoke Chicken Bake

All the flavor of Spinach Artichoke dip that you love but lightened up and made healthy on top of a lean protein packed chicken breast. This Spinach Artichoke Chicken Bake is made with fresh spinach low-fat yogurt making it the perfect healthy weeknight option for the entire family!

Photo Credit: thefitcookie.com

Sheet Pan Barbecue Chicken with Potatoes (Grain Free)

A barbecue rub makes this chicken tray bake super flavorful and guilt free. This whole sheet pan dinner comes together fast and bakes on a single sheet so getting dinner ready is easy and clean up is a breeze!

Baked Chicken Nuggets with Hidden Quinoa

Using 4 simple ingredients you can make the most delicious and easy homemade baked chicken nuggets with hidden quinoa. Whether you want the health benefits of quinoa or are trying to introduce quinoa to your child these oven baked chicken nuggets are easy to make and cook fast.

Slow Cooker

Set it and forget it, the best dump recipes to come home to!

Clean Eating BBQ Pulled Chicken made in the Slow Cooker

Throw out your sugary store bought BBQ sauce because this Healthy BBQ Pulled Chicken is going to blow your mind. An easy homemade sauce replaces that sugary store bought bbq sauce, mixed with chicken thighs and an onion it is cooked to perfection in the crockpot for a great BBQ pulled chicken!

Slow Cooker Black Bean Tortilla Soup

Slow Cooker Black Bean Tortilla Soup is a hearty and delicious vegetarian soup made in the crockpot using canned goods and fresh ingredients.

Photo Credit: myculturedpalate.com

Complete Chicken Dinner in Crockpot

Complete Chicken Dinner in Crockpot is a one dish meal that is delish! I love easy crockpot meals that require nothing else added, unless of course you just have a hankering for some bread or a salad.

Crockpot Bolognese

Simmered slowly in the crockpot this bolognese is made without standing over a stove for hours at a time. Just dump and have a delicious meal waiting when you get home!

Photo Credit: www.shugarysweets.com

Slow Cooker Cilantro Lime Chicken Recipe - Freezer Meal Idea

Cilantro Lime Chicken made in the crockpot (slow cooker) or as a freezer meal is packed with flavor! You’re family is going to love this dinner, you’re going to love how easy it is to prepare!

Slow Cooker Chicken Shawarma

If you are looking for the best weeknight Chicken Shawarma look no further. This restaurant quality chicken shawarma is so easy to throw into the crockpot in the morning and have dinner ready to eat when you get home! With minimal ingredients and a finishing method to make the chicken really pop this Chicken Shawarma in the Slow Cooker will become a regular on your dinner rotation!

Pressure Cooker

Under Pressure, let those pressure cookers do all the work and get dinner on the table in a flash!

Photo Credit: mealplanaddict.com

Weeknight Ribs…. in Your Instant Pot

Have ribs on a weeknight! Ready to go in under an hour and you can prep these ribs ahead of time! Seasoned with a dry rub you will almost think these are better than doing them in a smoker.

Photo Credit: spicecravings.com

Instant Pot Goulash Recipe

A simple and delicious comfort food recipe with ground meat and pasta cooked in a tomato sauce flavored with paprika and other spices. This American-style Instant Pot Goulash comes together in one-pot in just 30 minutes! It is one of our favorite weeknight meals!

Photo Credit: thebellyrulesthemind.net

Instant Pot Vegetable Chow Mein

Chinese Chow Mein made in an instant pot in under 15 minutes. It is so easy that you don’t need to be an expert in cooking to get the kudos you deserve. Do you ever have one of those nights where you want just want everyone to sit at the table and happily eat dinner, no complaining? This Instant Pot Vegetable Chow Mein recipe is my go-to recipe for that night. When I make these noodles everyone gobbles them up. They are so easy to make in this instant pot!

Photo Credit: www.perrysplate.com

Easy Thai Chicken Curry for Instant Pot – Perry's Plate

Make this flavorful, kid-friendly Thai Chicken Curry in your Instant Pot! (Also includes stovetop and slow cooker instructions!) Swap out the vegetables, protein, or even make it vegetarian. Super easy and can be made low-carb/keto or Whole30 friendly.

So there you have it 21 perfect recipe for successful weeknight dinners! Which one are you going to try first??

and as always…

If you enjoyed this recipe or any of my others let me know by using #theschmidtywife on social media!

And make sure you are following me on Instagram, Pinterest, and Facebook for all the latest recipes!

Peace & Love

Lauren, The Schmidty Wife

P.S. Looking for even more recipes? Check out my Shrimp Stir Fry or my Easy Southwest Chicken.

a collage of the best weeknight dinner recipes

Easy Roast Chicken with Vegetables Recipe

April 9, 2019 by Lauren Schmidt Leave a Comment

Don’t let the thought of cooking a whole chicken be intimidating, this post covers how to make an Easy Roast Chicken with Vegetables. With only a few minutes of prep you can roast chicken and vegetables in one pan making for an impressive yet simple family dinner. 

This post may contain Affiliate Links.

whole roasted chicken on a bed of veggies on a white platter

Easy Roast Chicken

I think an Easy Roast Chicken is something that every home cook should know how to make. A roasted chicken dinner is the epitome of a classic Sunday supper. If you haven’t made one before it might be slightly intimidating but never fear this post will walk you though how to make the simplest whole roasted chicken over a bed of delicious classic vegetables.

ingredients for the vegetables, carrots, celery, and an onion

What do I need to make this Roast Chicken and Vegetables Recipe?

Let’s start with a chicken! You’ll want around a 5 pound chicken, depending on where you shop you will see most chickens range from 4 to 6 pounds. 

Next you will need vegetables. Now I promised you a SIMPLE Easy Roast Chicken with Vegetables Recipe so we are just going to use carrots, celery, and onions. In my opinion the simplest of the vegetables. 

Olive oil. When looking at whole chicken recipes you see a lot of butter BUT I have made A LOT of roast chickens and I seriously love the olive oil ones the best so that is why I use olive oil. 

Good quality salt and pepper. Just table salt and pepper don’t quite cut it for this recipe. Because this is a simple recipe you rely on the simple ingredients that are used, so if you have better quality salt and pepper your bird is going to taste better. I recommend good sea salt or Himalayan salt and freshly cracked pepper for this dish.

Special tools needed are kitchen twine, meat thermometer, and a sheet pan. In order to keep the chicken cooking evenly you’ll want to truss the chicken together. In the most basic form, you’ll at least want to truss the legs together, or to put it more simply tie the legs together with the kitchen twine. As we dig into the method I’ll elaborate more on trussing. Meat thermometers aren’t required but are highly recommended, it is best to make sure your chicken is cooked to the proper temperature! You can use an instant read or a leave-in. And finally a sheet pan, no fancy roasting pan is needed to make a roast chicken, just a trusty sheet pan!

So how do you prepare the chicken for roasting?

To get the chicken ready to cook you’ll begin by removing the gizzards and rinsing the chicken in cold water. Using paper towels you will pat the chicken dry and place breast side up on a plate. If you aren’t sure which side is ‘breast side up’ you’ll want the legs and wings pointing upwards towards the ceiling (see pictures).

Now to truss, or tie up. Don’t let this step throw you off, it really is pretty simple. You’ll start with a piece of kitchen twine about 2 feet long. Place the middle of the twine near the neck opening of the chicken. Then bring the twine towards the back of the chicken ensuring the twine covers the wings and keeps them next the the body of the chicken. Bring the twine under the leg but above the thigh, cross the twine underneath the legs, then pushing the ends of the legs together and up wrap the twine around the  ends of the legs and tie. 

chicken trussed on a sheet pan over a bed of vegetables

The point of the truss is to bring the ends of the legs together to keep for an even bake, so you will at least want to ensure that you tie the legs together with kitchen twine. As for the wings I like to include them in the truss so as they don’t get over baked. Some methods of trussing and preparing chicken will have you bend the wings down and under but I have never found that to be easy or necessary.

Now that your bird is cleaned and trussed the hard part is over! After a good hand washing you’ll want to prepare the vegetables!

Lastly I do want to note, that this is a simple roast chicken so I have not added anything to the empty chicken cavity. Feel free to add herbs, garlic, vegetables, or lemons, I will note that stuffing the chicken does usually add to the cooking time. Stuffing a chicken can add a lot of extra flavor profiles, but it is not necessary to do to make a delicious dinner, sometimes basic is best!

How do I prepare the vegetables for cooking on the same pan as the chicken?

Now because the veggies will be in the oven for upwards of 2 hours (depending on the size of your chicken) you will want to leave the vegetables in bigger chunks! 

For the carrots you will want them peeled, or washed well. I have found the best size to cut the carrots to is to half them in both directions. Half the long way and then cut them in half the short way.

For the celery you will want to remove all the leaves and cut the celery about the same length of the carrots, about 2-3 inches depending on the size of your carrots!

Lastly you will want to cut the onion sort of how you would slice an apple. Peel the skin and remove the root and slice into 6-8 wedges. 

sheet pan filled with vegetables for step 1

Getting ready to cook the chicken 

Add the cut vegetables to a sheet pan and add 1 tablespoon of the olive oil. Toss to coat. Sprinkle a little salt and pepper over the vegetables, toss again. Spread out the vegetables to evenly cover the tray.

Place the chicken on the center of the sheet tray on top of the vegetables breast side up, making sure to keep the truss in place. Drizzle the remaining olive oil over the chicken, and gently rub the oil over the entire skin with your hands, add more oil if necessary.

(After you wash your hands) Sprinkle the chicken generously with salt, no need to skimp on the salt, cover the skin with a nice even layer. Add the pepper to taste.

sheet pan with vegetables and raw chicken

How long do you cook the chicken at 400º F?

You’ll want to preheat the oven to 400ºF. The nice thing about this recipe is you will be able to cook the chicken at 400º the whole time (some recipes call for a temp change). In a way this is somewhat of a set and forget recipe (or at least for an hour or so). So put the sheet pan chicken into the oven and bake about 1 hour and 45 minutes. In my oven I have found that is almost exactly that time every time but you will probably want to start checking the temp after 1 hour and 30 minutes.

So how will you know it is done? You will want to place a meat thermometer into the thickest part of the chicken breast. You’ll want to measure the temperature from the side, so stick the thermometer next to  where the neck was towards the thickest part of the breast. The chicken breast will read 175ºF when ready to come out of the oven. The chicken will continue to cook during the resting time, so by the time you are ready to carve the chicken the temp will be close to 180ºF.

So starting at 90 minutes of cooking start checking the temperature every 10 minutes or so until ready!

freshly cooked chicken on a sheet pan with vegetables
cooked chicken fresh out of the oven on a sheet pan

Rest time and serving!

It is important to note this isn’t a ‘serve immediately’ meal. You will need to let the chicken rest for at least 10 minutes. This gives the chicken time to finish cooking and retain the juices. 

Once the chicken is rested and cool enough to handle, carve the chicken to serve. Separate the breasts, wings, thighs, and legs to eat. Serve with the cooked vegetables.

close up of roast chicken breast
Easy Roast Chicken with Vegetables Recipe on a platter with a blue napkin roast chicken with vegetables | roast chicken and vegetables | roasted chicken with vegetables | roast chicken with vegetables in same pan | roast chicken over vegetables | how to roast chicken with vegetables | roast chicken on vegetables | roast chicken on vegetable bed | easy roast chicken and vegetables | easy roast chicken and vegetables recipe
a meal with roast chicken on a table

Tips & Tricks

• I love serving this simple dinner with my Garlic Parmesan Mashed Cauliflower or a salad like my Two Bean Mediterranean Salad

• Turn this simple roast chicken into your own by adding herbs, garlic, lemons, and other flavorings as desired

• I like to keep all of the vegetable scraps, chicken scraps, and bones to make easy homemade broth

Yield: 6 servings

Easy Roast Chicken with Vegetables Recipe

whole roasted chicken on a bed of veggies on a white platter

simple roasted whole chicken on a bed of classic vegetables

Prep Time 15 minutes
Cook Time 1 hour 45 minutes
Rest Time 10 minutes
Total Time 2 hours 10 minutes

Ingredients

  • 1 pound carrots (about 12 medium carrots)
  • 1 bunch celery
  • 1 large yellow onion
  • 4 tablespoons olive oil
  • sea salt & fresh black pepper
  • ~5 pound whole chicken*

Instructions

Prepare the Chicken: Begin by preheating the oven to 400ºF. Remove the gizzards and rinse the chicken in cold water. Pat the chicken dry and place breast side up on a plate. To truss, start with a piece of kitchen twine about 2 feet long. Place the middle of the twine near the neck opening of the chicken. Then bring the twine towards the back of the chicken ensuring the twine covers the wings and keeps them next the the body of the chicken. Bring the twine under the leg but above the thigh, cross the twine underneath the legs, then pushing the ends of the legs together and up wrap the twine around the ends of the legs and tie.

Prepare the Vegetables: peel the carrots and cut them half the long way and then cut them in half the short way, creating roughly 3 inch carrot sticks. For the celery you will want to remove all the leaves and cut the celery into pieces about the same length of the carrots. Lastly you will want to remove the peel and root and cut the onion into 6-8 wedges (think like slicing an apple).

  1. Add the vegetables to a sheet pan and add 1 tablespoon of the olive oil. Toss to coat. Sprinkle a little salt and pepper over the vegetables, toss again. Spread out the vegetables to evenly cover the tray.
  2. Place the chicken on the center of the sheet tray on top of the vegetables breast side up, making sure to keep the truss in place. Drizzle the remaining olive oil over the chicken, and gently rub the oil over the entire skin with your hands, add more oil if necessary.
  3. Sprinkle the chicken generously with salt, no need to skimp on the salt, cover the skin with a nice even layer. Add fresh ground pepper to taste.
  4. Transfer sheet pan to pre-heated oven and cook about 90-120 minutes. Using a meat thermometer you will want to to start checking the temperature for doneness every 10 minutes or so until the thickest part of the chicken breast has reached 175ºF**. The chicken will continue to cook during the resting time, so by the time you are ready to carve the chicken the temp will be close to 180ºF.
  5. Once out of the oven let the chicken rest for 10 minutes. Carve the chicken to serve with the vegetables.

Notes

*any chicken between 4-6 pounds works well in this recipe, cook times will vary based on the chicken size

**You will want to place a meat thermometer into the thickest part of the chicken breast. You'll want to measure the temperature from the side, so stick the thermometer next to where the neck was towards the thickest part of the breast. The chicken breast will read 175ºF when ready to come out of the oven. The chicken will continue to cook during the resting time, so by the time you are ready to carve the chicken the temp will be close to 180ºF.

Recommended Products

As an Amazon Associate and member of other affiliate programs, I earn from qualifying purchases.

  • Thermapen ONE
    Thermapen ONE

Nutrition Information:

Yield:

6

Serving Size:

1

Amount Per Serving: Calories: 660Total Fat: 40gSaturated Fat: 10gTrans Fat: 0gUnsaturated Fat: 26gCholesterol: 200mgSodium: 333mgCarbohydrates: 9gFiber: 3gSugar: 4gProtein: 63g

Nutritional data is automated, final nutritional information will depend on ingredients used and any changes made.

Did you make this recipe?

Please leave a comment below on the blog or share a photo with me tag @the_schmidty_wife! Can't wait to see what you made!

© Lauren Schmidt
Cuisine: American / Category: Main Dishes

And make sure you are following me on Instagram, Pinterest, and Facebook for all the latest recipes!

Peace & Love

Lauren, The Schmidty Wife

P.S. Looking for more chicken recipes? Check out my Easy Southwest Chicken, Supreme Pizza Chicken Bake, or my Crockpot Rotisserie Chicken.

Ground Pork Stir Fry Recipe

March 26, 2019 by Lauren Schmidt 8 Comments

This super easy Ground Pork Stir Fry Recipe is perfect for a quick and easy Asian inspired weeknight meal. Full of vegetables and inexpensive ground pork this meal only takes 15 minutes to make!

This post may contain Affiliate Links.

ground pork stir fry on a pile of rice on a white plate

Pork Stir Fry

What to make with ground pork? That is the question I asked myself not too long ago when I found myself with a pound of pork that need to be used. So I figured why not make an easy ground pork recipe for dinner. I decided I wanted to go with an Asian Inspiration, so I loosely based this recipe after one of my blogs top dinner recipes, Korean Ground Turkey & Rice Bowls.

For this Ground Pork Stir Fry Recipe I decided that I wanted to make it more of a stir fry over just a rice bowl by adding some vegetables!  So after the first time I made this stir fry I instantly knew it was going to have to get up on the blog.

Ready in 15 minutes, this dish is super fast but also inexpensive, healthy, and absolutely delicious! 

If you don’t have ground pork on hand but you have ground beef you can always give this Ground Beef Stir Fry a try!

ground pork stir fry on a pile of rice on a white plate

The Ingredients

Ground Pork. The most inexpensive out of all of the ground meats, at my local grocery you can find a pound of ground pork for nearly half the price of beef or turkey. So when you are on a budget, grab for that pork!

The Vegetables. I kept it simple with common vegetables to keep it inexpensive and easy. I use broccoli, carrots, and spinach. The best thing about using these ingredients is you can find them all at the store pre-prepped for you. If you are really short on time or just looking for ease you can get shredded carrots, broccoli florets, and pre-washed spinach at almost every grocery store. And even if you don’t get them pre-prepped, shredding a carrot and chopping broccoli into florets only takes a handful of minutes!

The flavorings. Again the name of the game with this recipe is simplicity so I only use a handful of ingredients to flavor the dish but the ingredients are selected because they all add of ton of flavor. You will use minced garlic, added to the vegetables. And then to make a quick stir fry sauce, soy sauce, ground ginger, and a little honey. So easy right! 

And then to garnish, simple sesame seeds and some chopped green onions do the trick beautifully!

Lastly you will want to serve this stir fry over rice. You can choose what fits you and your family, I love classic white rice but brown rice would work too. Heck even cauliflower rice would probably be delicious here!

overhead of two plates full of ground pork stir fry and two forks

Instructions

First you will make the super easy stir fry sauce! Combine the soy sauce, ground ginger, and honey in a small bowl and whisk together.


Then in a large skillet over medium-high heat crumble and brown ground pork for 5 minutes. There will probably be quite a bit of grease so you’ll want to drain that before adding the vegetables.
Reduce heat to medium and add the carrots, broccoli, garlic, and stir fry sauce. Cook together stirring occasionally about 4-5 minutes until vegetables are starting to become tender.


Add the spinach to the skillet. It seems like a large amount, but it wilts so much! So stir the spinach into the stir fry until it becomes reduced and wilted, about 2-3 minutes.


Remove from heat and serve immediately, best served over rice and garnished with sesame seeds and green onions!


And make sure you note! Since this stir fry comes together so fast it probably is going to take longer to cook your rice depending on the method. So start your rice cooking before you start your stir fry!

fork with a bite of ground pork stir fry with rice

tips, tricks and questions

Feel free to play with the veggies, add more or add different ones, onions would go well in here, so would snow peas.

If you like things spicy I recommend adding a little sriracha to the sauce.

close up of ground pork stir fry on rice

If you like this Ground Pork Stir Fry Recipe you might also like:

  • Quick Easy Pork Fried Rice
  • 20 Minute Chicken Stir Fry
  • Shrimp Stir Fry
  • Easy Southwest Chicken
  • Veggie Stir Fry
Yield: 4 servings

Ground Pork Stir Fry Recipe

plate full of rice and ground pork stir fry

ground pork, broccoli, carrots, and spinach make up this easy 15 minute stir fry

Prep Time 3 minutes
Cook Time 12 minutes
Total Time 15 minutes

Ingredients

  • 1 pound ground pork
  • 1 cup shredded carrots
  • 1 cup broccoli florets
  • 1 teaspoon minced garlic
  • 1/3 cup soy sauce
  • 1/4 teaspoon ground ginger
  • 2 teaspoons honey
  • 2 cups packed spinach

Garnishes:

  • sesame seeds
  • green onions

Instructions

  1. Make stir fry sauce by combining soy sauce, ground ginger, and honey in a small bowl and whisking together.
  2. In a large skillet over medium-high heat crumble and brown ground pork for 5 minutes. Drain grease from the skillet.
  3. Reduce heat to medium and add carrots, broccoli, garlic, and stir fry sauce. Cook together stirring occasionally about 4 minutes until vegetables are starting to become tender.
  4. Add the spinach to the skillet and stir together until spinach becomes cooked and wilted, about 2-3 minutes. Remove from heat and serve immediately, best served over rice and garnished with sesame seeds and green onions.

Notes

if making rice, chances are the rice will take longer to cook than the stir fry, so before starting the recipe, start cooking your rice

Nutrition Information:

Yield:

4

Serving Size:

1

Amount Per Serving: Calories: 447Total Fat: 28gSaturated Fat: 9gTrans Fat: 0gUnsaturated Fat: 16gCholesterol: 107mgSodium: 1338mgCarbohydrates: 15gFiber: 6gSugar: 5gProtein: 36g

Nutritional data is automated, final nutritional information will depend on ingredients used and any changes made.

Did you make this recipe?

Please leave a comment below on the blog or share a photo with me tag @the_schmidty_wife! Can't wait to see what you made!

© Lauren Schmidt
Cuisine: Asian / Category: Main Dishes

And make sure you are following me on TikTok, Instagram, and Pinterest, for all the latest recipes!

Baked Chicken Nuggets with Hidden Quinoa

February 26, 2019 by Lauren Schmidt 4 Comments

Using 4 simple ingredients you can make the most delicious and easy homemade Baked Chicken Nuggets with Hidden Quinoa. Whether you want the health benefits of quinoa or are trying to introduce quinoa to your child these oven baked chicken nuggets are easy to make and cook fast.

This post may contain Affiliate Links.

a toddler hand holding a baked chicken nugget

So these chicken nuggets are actually the second recipe for baked chicken nuggets on my blog, but you guys the two recipes are soooo different! Isn’t it funny how recipes can be the same thing but not at the same time. So in my first recipe, Healthier Baked Chicken Nuggets {Gluten Free} the chicken nuggets are cut from a chicken breast and marinated, they are then dredged in egg and gluten free flours, and baked in coconut oil. My new Baked Chicken Nuggets with Hidden Quinoa are made with ground chicken, then formed into a nugget with a little parmesan and quinoa, covered with breadcrumbs, lightly sprayed with oil and baked on a sheet pan. Both are amazing but in totally different way.

So for this Baked Chicken Nugget Recipe I wanted to do easy. So I started with ground chicken, I find ground chicken cheap and easy to work with, not only for chicken nuggets but you could use it in a variety of ways you’d use other ground meats. 

I also used the least amount of ingredients that I could. I experimented a lot with the different ratios of what to add. I made a few batches with way too much quinoa in them, some with too much water, I tried to make them without a touch of cheese. I found many ways that weren’t quite right, and then I made a this recipe, and my husband Matt announced “These are the ones”. So here I am sharing them with you.

So let’s take a look at the ingredients in these Baked Chicken Nuggets with Hidden Quinoa. I will also let you know the necessary steps to make sure these are nice and crispy when baked in the oven!

Try serving these chicken nuggets with Honey Mustard Mayo or Southwest Dressing for dipping!

measured ingredients for chicken nuggets

The Ingredients

Ground Chicken. Chicken, the one thing everyone is sure to have in the fridge right?! But have you tried cooking with ground chicken yet? I love it because it can simplify so many recipes, just like these chicken nuggets! Just like almost everyone I love chicken because it is a heathy lean protein that keeps the family satisfied and healthy!

Quinoa. This nutrient dense pseudo grain is such an important food that the UN declared 2013 the “International Year of Quinoa” due to its potential for worldwide food security. Quinoa is high in protein, fiber, folate, manganese, magnesium, phosphorus, copper, iron, zinc, potassium, vitamins B1, B2 and B6. Quite a list right!?! If you want to learn even more check out this article 11 Proven Healthy Benefits of Quinoa. And they best part is the texture of the cooked quinoa blends right into the chicken. So lets say you have a picky little eater or husband, you might be able to serve this and they wouldn’t even be able to tell! Give it a try, I want to know!

Parmesan. Just a little parmesan to give it a flavor boost. Part of the parm goes into the breadcrumbs and part goes into the chicken. I use freshly grated parmesan right off the block, but pre-grated should work just as good.

A little water and salt is also added to the mixture for a little extra moisture and flavor. 

And then breadcrumbs. I use just plain packaged breadcrumbs, but really any kind of breadcrumbs would work here. Italian breadcrumbs, panko, gluten-free, whatever fits your family best!

Lastly a cooking oil to finish. To make the nuggets nice and crispy you need to finish the nuggets with a spray or drizzle of oil. I find my Spray Pump Olive Oil Cooking Spray works best. Just enough to lightly coat the nuggets, you don’t want to drown the nuggets in oil. 

ingredients in a bowl for Baked Chicken Nuggets with Hidden Quinoa
uncooked freshly formed chicken nuggets ready for the oven

The Method

Preheat oven to 350º F.

In a small bowl or plate add breadcrumbs and half of the parmesan cheese, mix together and set to the side.

In a large bowl add chicken, quinoa, water, salt, and the remaining parmesan cheese. Mix ingredients together until fully combined, using your hands works best.

Grab a golf ball sized amount of the chicken mixture and form a ball, press into the bread crumbs to form a nugget, flip nugget to fully coat with breadcrumbs. Transfer nugget to a sheet pan.

Repeat until all of the chicken mixture is used, it should make 24-25 nuggets. The nuggets can be close on the sheet pan but not touching, they will shrink slightly.

Lightly spray or drizzle cooking oil onto each of the nuggets. I usually use olive oil out of a pump sprayer. Not a lot of oil is needed but enough to lightly coat the nuggets.

Transfer sheet pan to the oven and bake 15 minutes.

Turn oven to broil and bake an additional 3-4 minutes until chicken nuggets are golden brown. Serve immediately, goes best with your favorite dipping sauce.

sheet pan full of baked chicken nuggets
close up of a baked chicken nugget
Inside of a Sneaky Quinoa Baked Chicken Nugget

tips, tricks and questions

• You want the quinoa to be totally cooled down for best results, I have found if the quinoa is still slightly warm the nuggets will release a little extra water.

• The chicken nuggets reheat really well so they can be saved in the fridge or freezer.

• Need some sides? Check out my Crispy Oven Roasted Baby Yukon Potatoes, Rosemary Parmesan Baked Potato Wedges, or serve with my Healthy Yogurt Ranch Dip.

You Might Also Like:

  • Turkey Veggie Meatloaf Muffins
  • Korean Ground Turkey & Rice Bowls
  • Healthier Baked Chicken Nuggets (Gluten Free)
  • Easy Chicken Cordon Bleu

If you like this Chuck Roast Crockpot Recipe you might also like:

  • Turkey Veggie Meatloaf Muffins
  • Korean Ground Turkey & Rice Bowls
  • Healthier Baked Chicken Nuggets (Gluten Free)
  • Easy Chicken Cordon Bleu
  • Pretzel Crusted Chicken Tenders
Yield: 5 servings

Baked Chicken Nuggets with Hidden Quinoa

a toddler hand holding a baked chicken nugget

Easy homemade chicken nuggets using ground chicken and sneaky quinoa!

Prep Time 11 minutes
Cook Time 19 minutes
Total Time 30 minutes

Ingredients

  • 2 pounds ground chicken
  • 1 cup cooked quinoa, cooled
  • 1/4 cup shredded parmesan
  • 1/4 cup water
  • 1/2 teaspoon salt
  • 3/4 cup breadcrumbs*
  • cooking oil for the pan

Instructions

  1. Preheat oven to 350º F.
  2. In a small bowl or plate add breadcrumbs and half of the parmesan cheese, mix together and set to the side.
  3. In a large bowl add chicken, quinoa, water, salt, and the remaining parmesan cheese. Mix ingredients together until fully combined, using your hands works best.
  4. Grab a golf ball sized amount of the chicken mixture and form a ball, press into the bread crumbs to form a nugget, flip nugget to fully coat with breadcrumbs. Transfer nugget to a sheet pan.
  5. Repeat until all of the chicken mixture is used, it should make 24-25 nuggets. The nuggets can be close on the sheet pan but not touching.
  6. Lightly spray or drizzle cooking oil onto each of the nuggets. I usually use olive oil out of a pump sprayer. Not a lot of oil is needed but enough to lightly coat the nuggets.
  7. Transfer sheet pan to the oven and bake 15 minutes.
  8. Turn oven to broil and bake an additional 3-4 minutes until chicken nuggets are golden brown. Serve immediately, goes best with your favorite dipping sauce.

Notes

*you can use whatever packaged breadcrumbs serve your family best, I use plain but Italian seasoned, panko, or gluten-free would all work well in this recipe

Recommended Products

As an Amazon Associate and member of other affiliate programs, I earn from qualifying purchases.

  • PAM Spray Pump Olive Oil Cooking Spray
    PAM Spray Pump Olive Oil Cooking Spray

Nutrition Information:

Yield:

5

Serving Size:

5 nuggets

Amount Per Serving: Calories: 352Total Fat: 18gSaturated Fat: 3gTrans Fat: 0gUnsaturated Fat: 1gCholesterol: 136mgSodium: 387mgCarbohydrates: 17gFiber: 1gSugar: 0gProtein: 40g

Did you make this recipe?

Please leave a comment below on the blog or share a photo with me tag @the_schmidty_wife! Can't wait to see what you made!

© Lauren Schmidt
Cuisine: American

And make sure you are following me on TikTok, Instagram, and Pinterest, for all the latest recipes!

Simple Vegetable Rice Soup

February 19, 2019 by Lauren Schmidt 39 Comments

Perfect for a light meal or a side dish this simple vegetable rice soup is made with classic vegetables, chicken broth, and rice. Reminiscent of chicken noodle soup but simpler and lighter.

This Simple Vegetable Rice Soup is perfect as a comforting side dish or a light meal
This easy and simple vegetable rice soup is a comforting and healthy

At our house we call this ‘sick soup’ mostly because when I see the signs of a cold coming or when someone isn’t feeling well, I drop what I was going to make for dinner and fix this instead. Simple and comforting I almost always have all the ingredients on hand. So today I will be sharing this much loved family recipe, ‘sick soup’ or more commonly Simple Vegetable Rice Soup.

Now just because I call this ‘sick soup’ doesn’t mean I always make it when we are sick or you have to make it when you are sick. I make this soup as both a side dish and a main dish depending on the day. As a main dish I’ll often pair it with a salad or a simple sandwich like a grilled cheese, you know the deal ‘pick two’ soup, salad, sandwich… As a side I usually will pair it if I am making a meal based around meat to even the meal out, so I’ll pair it with a roast chicken or pork chops. 

In my house I consider all the ingredients I have in this soup staples so I am able to make it at a drop of a hat, so let’s take a look at what is in this!

onions, carrots, celery (mirepoix) on a cutting board for the soup

The Ingredients

Vegetables. The vegetables for this soup I consider basic and staples, onion, carrots, and celery. This trio of vegetables is also known as the ‘holy trio’ in some cuisines and in French cooking is called Mirepoix. A perfect base to a simple soup. Although a mirepoix is usually 2 parts onions, 1 part carrot, 1 part celery, for this soup I decided more carrots and celery was best.

The broth/water. So to be fair this part I definitely do a little different every time and feel free to use what works best for you. I either use my homemade chicken broth, bouillon with water, or store-bought broth. I also will sometimes use 4 cups broth and 4 cups water or when I want a richer flavor I will do all 8 cups broth. 

Rice. I usually have Jasmine rice in my pantry so thats what I use, but almost any kind should work here. I would give your rice a quick doneness test before you serve it though if you do use a different kind. 

Seasonings. I only season this with dried parsley because I like the simpleness of the soup and I don’t want to take away from that but you could also add a touch of salt or some bay leaves if you were looking for a little more flavor. 

close up of a pot full of simple vegetable rice soup

The Method

In a large pot heat olive oil over medium-high heat until hot and shimmering. Add onion, carrots, and celery. Cook 3-4 minutes stirring occasionally until tender and translucent.

Add chicken broth and water, bring to a boil.

At a roiling boil add the rice and parsley. Cover, reduce to medium heat and cook for 15 minutes or until the rice is tender. Serve immediately.

simple vegetable rice soup ready to serve in the pot

a bowl of simple veggie and rice soup

TIPS & TRICKS

• You can add other vegetables you have on hand, mushrooms, chopped potatoes, or peppers would all be a lovely addition to this soup

• This soup doesn’t keep super well, the rice absorbs most of the moisture if it sits overnight, my kids still love to eat it this way but it won’t be as watery as it originally was

Yield: 4 servings

Simple Vegetable Rice Soup

carrots, celery, and rice in a soup pot

perfect for a light meal or a side dish this simple soup is made with classic vegetables and rice

Prep Time 5 minutes
Cook Time 25 minutes
Total Time 30 minutes

Ingredients

  • 1 tablespoon olive oil
  • 1 medium onion, diced
  • 4 carrots, chopped
  • 4 stalks celery, chopped
  • 4 cups chicken broth*
  • 4 cups water
  • 1/2 cup rice
  • 1 tablespoon dried parsley

Instructions

  1. In a large pot heat olive oil over medium-high heat until hot and shimmering. Add onion, carrots, and celery. Cook 3-4 minutes stirring occasionally until tender and translucent.
  2. Add chicken broth and water, bring to a boil.
  3. At a roiling boil add the rice and parsley. Cover, reduce to medium heat and cook for 15 minutes or until the rice is tender. Serve immediately.

Notes

*I almost always use Better than Bouillon to make this soup. You can also use a full 8 cups of broth for a deeper flavor.

I don't find that I need extra salt in this soup but depending on what broth you use you may want to add a little

Nutritional data is automated, final nutritional information will depend on ingredients used and any changes made.

Recommended Products

As an Amazon Associate and member of other affiliate programs, I earn from qualifying purchases.

  • Better Than Bouillon, Roasted Chicken Base
    Better Than Bouillon, Roasted Chicken Base

Nutrition Information:

Yield:

4

Amount Per Serving: Calories: 131Total Fat: 4gSaturated Fat: 0gTrans Fat: 0gUnsaturated Fat: 2gCholesterol: 11mgSodium: 80mgCarbohydrates: 12gFiber: 2gSugar: 3gProtein: 6g

Did you make this recipe?

Please leave a comment below on the blog or share a photo with me tag @the_schmidty_wife! Can't wait to see what you made!

© Lauren Schmidt
Cuisine: American / Category: Soup

Peace & Love

Lauren, The Schmidty Wife

P.S. Looking for more soups like my Simple Vegetable Rice Soup? Check out my Homestyle Crockpot Chicken Noodle Soup or my Slow Cooker Black Bean Tortilla Soup.

Please note that my links above may be affiliate links, and I will earn a commission if you purchase through these links. I recommend them because they are helpful, and are companies that I trust, not because of the commissions that I may earn from you using these products.

Turkey Veggie Meatloaf Muffins

February 12, 2019 by Lauren Schmidt 2 Comments

Healthy and good for you too, these naturally gluten free turkey veggie meatloaf muffins are full of vegetables, healthy ground turkey, and delicious flavors. Whether you make them for dinner or meal prep your family will be wanting more!

Turkey Veggie Meatloaf Muffins - a healthy gluten-free dinner the whole family will enjoy
Turkey Veggie Meatloaf Muffins
Turkey Veggie Meatloaf Muffins - a healthy vegetable packed gluten-free dinner

This is one of those recipes I tested A LOT to make sure I got it absolutely right to share! I wanted to make sure I made these Turkey Veggie Meatloaf Muffins delicious but I also wanted them to be full of whole grains, vegetables, and lean turkey.

I tried adding milk, tried different amount of oats, lots of different vegetables until I found just the right combination of ingredients!

toddler hand holding a turkey meatloaf muffin

The Ingredients

Ground Turkey. I love ground turkey and I know I am not alone when I see how many people visit my other recipes that use ground turkey. Such a great substitute for ground beef! I have found in this recipe that the fat content doesn’t matter too much but I found that a little bit more fat did make these taste and hold together better.

Oats. I wanted to make sure the binding agent in these was wholesome and heathy. Luckily oats were everything I ever wanted. These heart healthy whole grains are the perfect substitute to the typical breadcrumbs. Not only are they 100% whole grain they also make these gluten-free! I tested these with both quick oats and old-fashioned oats, the result? Both worked great! Although I did prefer the quick oats because they blended in more.

The vegetables. I landed on a combination of carrot, celery, and garlic. I tried a number of different veggies and these seemed to groove together very nicely. Mincing the vegetables in the food processor worked really well, so I recommend that if you have one, or a food chopper would probably work just as well. If you don’t have those tools you can certainly chop and mince them by hand but the vegetables just won’t be quite as fine. 

Egg. These did need the help of a binding agent, an egg. Adding an egg will keep these meatloafs together for you to enjoy.

Ketchup. So I am not a huge fan of ketchup honestly but I did feel like these mini meatloafs needed it. So at my house to try to keep it clean by getting sugar-free or naturally sweetened ketchup and I recommend this approach but ultimately use what is easiest for you. In a perfect world I would always make homemade ketchup but I rarely have time to do that these days. 

Seasonings. I just simply added and little salt and onion powder to these, not overly complicated and seasonings I am pretty sure everybody has!

vegetables in a food processor minced ready to go into the meatloaf

ingredients in a bowl to make the turkey veggie meatloaf muffins

The Method

These muffins aren’t overly complicated, one of the things that makes them great. You basically mix the ingredients together put them in a muffin tin and bake.

Start by preheating the  oven to 375º F. Line muffin tin with silicone muffin liners or lightly grease the muffin tin. So if you check out any of my other muffin recipes like my Double Batch Spinach Sausage Egg Muffins you’ll know I am a huge fan of my silicone muffin liners. I find that it helps keep these muffins consistent and the clean up is so easy!!

To prepare the vegetables add carrot, celery, and garlic to a food processor, pulse until minced into little pieces, it shouldn’t take longer than about 10 seconds. Alternately use a food chopper or mince by hand. If you are mincing by hand try to get the veggies as fine as you can.

Add the minced vegetables, oats, egg, 2 tablespoons of ketchup, salt, onion powder to a large bowl. Add ground turkey to the bowl and gently mix with either a large spoon or your hands until everything is just combined and sticking together. If you over mix the meatloaf mixture it will result in a dense meatloaf and no one wants that!

Divide the meatloaf mixture between the muffin tin.

Squirt a little amount of ketchup on the top of each meatloaf muffin, use the back of a spoon to spread out to form an even layer of ketchup on top.

Transfer to the oven and bake 22-25 minutes until fully cooked. Serve immediately or store in an airtight container in the refrigerator. These do make a great meal prep option!

ketchup being spread on a turkey meatloaf muffin

a muffin tin full of turkey veggie meatloaf

turkey veggie meatloaves in a muffin tin

TIPS & TRICKS

• Like most meatloafs these keep in the fridge and freezer well

Yield: 12 muffins

Turkey Veggie Meatloaf Muffins Recipe

a muffin tin full of turkey veggie meatloaf

veggie packed gluten-free mini turkey meatloafs

Prep Time 8 minutes
Cook Time 22 minutes
Total Time 30 minutes

Ingredients

  • 20 oz ground turkey
  • 1/2 cup quick or old fashioned oats
  • 1 carrot
  • 1 stalk celery
  • 2 cloves garlic
  • 1 egg
  • 2 tablespoons ketchup* + additional for topping
  • 1/2 teaspoon salt
  • 1/2 teaspoon onion powder

Instructions

  1. Preheat oven to 375º F. Line muffin tin with silicone muffin liners or lightly grease the muffin tin.
  2. Add carrot, celery, and garlic to a food processor, pulse until minced into little pieces, it shouldn't take long about 10 seconds. Alternately use a food chopper or mince by hand.
  3. Add minced vegetables, oats, egg, 2 tablespoons of ketchup, salt, onion powder to a large bowl. Add ground turkey to the bowl and gently mix with either a large spoon or your hands until everything is just combined and sticking together. If you over mix the meatloaf mixture it will result in a dense meatloaf.
  4. Divide mixture between the muffin cavities, each cavity should be about full.
  5. Squirt a little amount of ketchup on the top of each meatloaf muffin, use the back of a spoon to spread out to form an even layer of ketchup on top.
  6. Transfer to the oven and bake 22-25 minutes until fully cooked. Serve immediately or store in an airtight container in the refrigerator.

Notes

*I use sugar-free ketchup, if you want to keep this recipe 'clean' I recommend a ketchup without sugar or that uses natural sweetness such as honey instead

Nutritional data is automated, final nutritional information will depend on ingredients used and any changes made.

Recommended Products

As an Amazon Associate and member of other affiliate programs, I earn from qualifying purchases.

  • Reusable Silicone Baking Cups
    Reusable Silicone Baking Cups

Nutrition Information:

Yield:

6

Serving Size:

2 muffins

Amount Per Serving: Calories: 214Total Fat: 9gSaturated Fat: 2gTrans Fat: 0gUnsaturated Fat: 5gCholesterol: 96mgSodium: 319mgCarbohydrates: 12gFiber: 2gSugar: 2gProtein: 22g

Did you make this recipe?

Please leave a comment below on the blog or share a photo with me tag @the_schmidty_wife! Can't wait to see what you made!

© Lauren Schmidt
Cuisine: American / Category: Main Dishes

Peace & Love

Lauren, The Schmidty Wife

P.S. Looking for more quick dinners like my Turkey Veggie Meatloaf Muffins? Check out my Korean Ground Turkey & Rice Bowls or my Secret Ingredient Turkey Chili.

Please note that my links above may be affiliate links, and I will earn a commission if you purchase through these links. I recommend them because they are helpful, and are companies that I trust, not because of the commissions that I may earn from you using these products.

Secret Ingredient Turkey Chili

November 7, 2018 by Lauren Schmidt Leave a Comment

Secret Ingredient Turkey Chili Pinterest Pin
Secret Ingredient Turkey Chili Pinterest 2
Secret Ingredient Turkey Chili Crockpot Pin

It wouldn’t be Fall on The Schmidty Wife without a chili recipe. To me chili is the ultimate Fall comfort food, everything about it is so perfect. So this year I conjured up Secret Ingredient Turkey Chili. So you want to know what the secret ingredient is?

Peanut Butter! Yaaaasss peanut butter!

Peanut butter in chili is a thing. I didn’t know it was a thing until I met my husband who claimed it was in his famous ‘Dorm Room Chili’ that he used to cook up in his dorm room and sell by the bowl to people. Such a spirited entrepreneur my Matt is haha* (*I would like to note though after 4 years of marriage I still have yet to taste his famous chili). 

Anyways we were watching an episode of Triple D on the Food Network and I honestly don’t remember what they were making but they added peanut butter, it was a food that was weird to add peanut butter to. So Matt and I were discussing it and I decided that peanut butter would be the perfect addition to a bowl of turkey chili.

Ground Turkey can sometimes be a little on the bland side if you don’t give it some great flavors. So I set out to make a flavorful turkey chili but I also didn’t want it spicy and relying on heat to give it all its flavor. I do have little kids after all and I didn’t want to make a large batch of chili and for them not to touch it. 

So lets take a look at what I put in this super flavorful Secret Ingredient Turkey Chili.

The Ingredients

Ground turkey. I love me some ground turkey, all the convenience of ground beef but not red meat! Yay! I have slowly been cutting my family down on red meat. Born in the midwest both Matt and I grew up with a lot of beef, turns out red meat is only okay in moderation, so I have been trying to serve red meat to my family no more than once a week. So a great replacement for us has been ground turkey, hence why I set out to make an awesome Turkey Chili.

The vegetables. For this chili I chose to go with 3 fresh vegetables, 1 onion, 1 red bell pepper, and 1 green bell pepper. I feel like an onion is a must for chili, and as Kevin Malone from The Office would claim “The trick is to undercook the onions”. For fresh peppers I choose a variety of bell peppers, not known for their heat I thought they would bring a nice addition to the chili. For canned vegetables I went with a large can of diced tomatoes and a small can of green chilies. For the diced tomatoes I like to chose the no salt added variety because that way I get to control the salt levels in the chili. And for a slight flavor kick, a small can of minced green chilies. 

The legumes, or beans if you will. I decided to not fuss to much about the beans and just chose a single variety and went with the classic kidney bean. Not only are kidney beans great because they generally are really good at taking on the flavors of whatever spices you use but they are also very healthy for you, they are high in protein, folic acid, and fiber just to name a few of the health benefits. 

The spices. Ditch those seasoning packets, it is so darn easy to make a good chili seasoning at home. The seasoning for this chili includes classics like chili powder, cumin, salt, garlic, and onion but I also decided to go with. little cocoa powder for added smoothness and flavor not the mention chocolate goes perfect with…

Peanut Butter. I always make my own peanut butter, which sounds a little pretentious but you guys know how easy it is right?! You can check out my post How to Make 100% Peanut Butter if you are interested. Otherwise I recommend using 100% peanut butter to keep the sugar levels low but feel free to use what peanut butter you have on hand. It brings a creaminess and nuttiness you otherwise wouldn’t get in a chili. I would like to note, if you are planning on bringing this chili anywhere make sure people know it contains nuts, nut allergies can be serious and people most likely don’t expect peanut butter to be in their chili.

Secret Ingredient Turkey Chili Ingredients in the slow cooker before cooking

The Method 

Brown ground turkey in a skillet. 

Dump everything into your slow cooker.

Cook on low 6-8 hours. 

DON’T YOU JUST LOVE CROCKPOT MEALS!!! But for real, I love my crockpot, just dump it all in there and give it a stir. I honestly think that slow cookers are the perfect device for chili.

So now that you know the secret ingredient to this Secret Ingredient Turkey Chili are you excited to try it? Tell me what you think about peanut butter in your chili in the comments!


bowl of secret ingredient turkey chili

an overhead shot of 3 bowls of Secret Ingredient Turkey Chili on a table

TIPS & TRICKS:

• Like with most chili it gets more flavorful if you make it a day ahead, I found that the peanut butter is a little more prevalent when the chili is fresh and gets more mellow after I let it sit overnight and then reheated it back up

• I use one green and one red bell pepper, you could probably use whatever colors you really wanted to 

• Looking for other chili recipes, check out my Classic Crockpot Chili or my Crockpot Creamy Pumpkin Chili

Yield: 6 servings

Secret Ingredient Turkey Chili Recipe

a full bowl of turkey chili with garnishes

peanut butter gives this turkey chili a unique nutty and creamy flavor made easy in the slow cooker

Prep Time 15 minutes
Cook Time 8 hours
Total Time 8 hours 15 minutes

Ingredients

  • 20 ounces ground turkey
  • 1 medium onion, diced
  • 1 green bell pepper, diced
  • 1 red bell pepper, diced
  • 28 ounce can diced tomatoes
  • 4.5 ounce can green chilies
  • 28 ounce can red kidney beans*
  • 1/2 cup 100% peanut butter
  • 2 tablespoons chili powder
  • 1 teaspoon cumin
  • 1 teaspoon salt
  • 1 teaspoon cocoa
  • 1/2 teaspoon garlic powder
  • 1/2 teaspoon onion powder
  • 1 teaspoon minced garlic

Instructions

  1. In a large skillet over medium-high heat brown the ground turkey, about 7-10 minutes. Drain and add to slow cooker.
  2. Add onion, green bell pepper, red bell pepper, diced tomatoes, green chilies, red kidney beans, peanut butter, chili powder, salt, cocoa, garlic powder, onion powder, and garlic to the crockpot. Stir to combine. Cover and cook on low for 6-8 hours.
  3. Serve with garnishes such as sour cream, green onions, cheese, and saltines.

Notes

*two 15 ounces cans of kidney beans will also work (same with diced tomatoes), don't drain the cans it adds extra flavor to add the liquids

Nutritional data is automated, final nutritional information will depend on ingredients used and any changes made.

Recommended Products

As an Amazon Associate and member of other affiliate programs, I earn from qualifying purchases.

  • Hamilton Beach 6-Quart Slow Cooker
    Hamilton Beach 6-Quart Slow Cooker

Nutrition Information:

Yield:

6

Amount Per Serving: Calories: 444Total Fat: 18gCholesterol: 65mgSodium: 621mgCarbohydrates: 38gFiber: 14gSugar: 7gProtein: 36g

Did you make this recipe?

Please leave a comment below on the blog or share a photo with me tag @the_schmidty_wife! Can't wait to see what you made!

© Lauren Schmidt
Cuisine: American

Peace & Love

Lauren, The Schmidty Wife

P.S. Love your slow cooker like me? Check out my Crockpot Cheater Beef Pho or my Slow Cooker Chipotle Pineapple Carnitas.

Please note that my links above may be affiliate links, and I will earn a commission if you purchase through these links. I recommend them because they are helpful, and are companies that I trust, not because of the commissions that I may earn from you using these products.

Spinach Mushroom Stuffed Baked Potatoes with Cheddar

October 31, 2018 by Lauren Schmidt Leave a Comment

Spinach Mushroom Stuffed Baked Potatoes with Cheddar - a healthy and easy vegetarian meal

I will probably say this in the intro to every baked potato recipe I have but baked potatoes are one of my favorite meals. There are so many different ways top and stuff them, it seems like an endless combination of delicious meals! Well today’s Spinach Mushroom Stuffed Baked Potatoes with Cheddar is just one of the most delicious was to top your potatoes.

So true story when I was pregnant with my oldest son Archie, I had pretty bad morning sickness for essentially the first half of my pregnancy and I basically hated all food, with very few exceptions. One of these exceptions was a baked potato from Wendy’s. For about a month it was almost the only thing I could tolerate. I recall one time my husband drove by a Wendy’s restaurant and did not stop and get me a baked potato, instant meltdown (pregnancy hormones…). So it is only fitting to this day that I still love bake potatoes and my son Archie loves baked potatoes.

These Spinach Mushroom Stuffed Baked Potatoes are perhaps a tad healthier then the cheese smothered Wendy’s equivalent and probably easier to make than getting the family into the car and driving to the nearest Wendy’s.

The Ingredients

Baked Potatoes. In this recipe I use the oven to bake my potatoes but the beautiful thing about baked potatoes is there are more than one way to bake them, so if the oven doesn’t work for you bake them in the slow cooker, pressure cooker, or even in the microwave to make the time work best for you. Baked potatoes also have a ton of health benefits, they are an excellent source of vitamin C & B6, a good source of potassium (more than a banana!), plus they are fat-, sodium-, and cholesterol-free. Not to mention a medium sized potato is roughly 110 calories. So top your ‘taters with confidence knowing that you are feeding your family a healthy meal.

Mushrooms. I always refer to mushrooms as vegetables even though they aren’t, don’t you just kind of lump them in with veggies or is that just me? Either way I feel like they are one of those foods people aren’t indifferent about, they either like them or they don’t. Well I like them, hence why they are in this recipe. I like to buy the presliced one, because hello, so much easier for me when it comes time to cook dinner, although if you would like them to cook a little faster give them a quick chop just to make the pieces a bit smaller.

Onions, great flavor and really the only ‘work’ in this recipe because they have to be diced. Do you know how to correctly dice onions? I watched Gordon Ramsay do it in this video 3 years ago and it changed my life. It makes every onion 10,000% easier to dice once you get the hang of it. Do yourself a favor watch it, start practicing.

White Wine, yes this sauce benefits from oh so delicious white wine. You can use cooking wine or *cough cough* drinking wine, I use chardonnay because that is what I have in my house. If you don’t want to use wine or don’t have it on hand you could sub either vegetable or chicken broth but it will have a slightly different taste.

Garlic, for flavor. Again like the mushrooms I use pre-mined garlic, but if you are looking for maximum flavor and you have the time you can mince your own garlic.

Spinach, everyones favorite greens right? I use a full bag of 5 ounce baby spinach in this recipe. I always find it humorous that a full bag of spinach cooks down to what seems to be almost nothing. So when you add the full bag to the skillet, it might seem too much don’t worry its not, it will wilt down a lot.

Plain yogurt, just a touch to make the sauce slightly creamy. I prefer just plain low fat yogurt, greek yogurt could be used here but it will add a little more tanginess to the sauce versus creaminess.

And delicious Sharp Cheddar Cheese. This potato benefits form a nice extra sharp aged cheddar with an extra bite really compliments that mushroom spinach sauce. I personally believe the best sharp cheddar comes in blocks and not preshredded, so I recommend buying a block and grating it yourself. Sorry not everything in life comes better pre cut 😉

The Method 

As mentioned before, bake the potatoes. In the recipe I give instructions to bake them in the oven. If you want to bake them in the microwave/slow cooker/instant pot go for it. You’ll still want the oven on if you want the cheese melted (you could probably even use the broiler if you don’t want to turn the full oven on) (or even melt the cheese in the microwave?). I prefer the oven method because it gives the potatoes a crispy outside and a fluffy inside.

Once the potatoes are baked you will give them a few minutes to cool before cutting open the top. You will want to make a single cut in the top leaving the ends intact. Nice the potatoes a squish together to open them up. Sprinkle with cheese and return to the oven for the cheese to melt.

The mushroom spinach sauce is super easy to make in the skillet while the potatoes are cooking. You’ll add a little oil and onions to the skillet and cook until translucent. Add the mushrooms and cook until watery and softened. The garlic and white wine will then be added to simmer away and reduce. The spinach will then be added to and cooked down. As you turn off the heat you’ll add the yogurt.

Top your cheesy potatoes with the sauce and boom, dinner is served. Enjoy your Spinach Mushroom Stuffed Baked Potatoes!

Spinach Mushroom Stuffed Baked Potatoes with Cheddar dripping down the side on a sheet pan

Spinach Mushroom Stuffed Baked Potatoes on a plate with a fork

TIPS & TRICKS:

• Make the sauce as the potatoes are finishing cooking, the sauce comes together quick so you should be able to do that and get cheese on the potatoes at the same time

• If you don’t want to use wine or don’t have it on hand you could sub either vegetable or chicken broth but it will have a slightly different taste

Yield: 4 Servings

Spinach Mushroom Stuffed Baked Potatoes with Cheddar

Spinach Mushroom Stuffed Baked Potatoes with Cheddar dripping down the side on a sheet pan

a baked potato stuffed with sharp cheddar cheese and a simple mushroom spinach sauce

Prep Time 5 minutes
Active Cook Time 25 minutes
Inactive Cook Time 1 hour
Total Time 1 hour 30 minutes

Ingredients

  • 4 large russet potatoes
  • 2 tablespoons olive oil
  • 1 medium onion, diced
  • 8 oz sliced white mushrooms
  • 1/2 cup white wine
  • 1 teaspoon minced garlic
  • 1 5oz bag fresh baby spinach
  • 2 tablespoons plain yogurt
  • 1 cup shredded sharp cheddar cheese
  • crushed red pepper for garnish

Instructions

For the Potatoes:

  1. Preheat oven to 400º F. Poke the potatoes all over with a fork. Using 1 tablespoon of the olive oil, rub each potato with the oil to lightly grease each one. Sprinkle with salt and pepper to taste. Place on a sheet pan and bake for 60-70 minutes. Remove potatoes from oven to cool slightly. Cut open the potatoes, slice the top lengthwise and gently squeeze the potato to open up the middle of the potato revealing more of the fluffy white center. Sprinkle 1/4 cup of cheese inside each of the potatoes, place in oven and bake 5-6 minutes until cheese is nice and melty. Top with Spinach Mushrooms Sauce.

For the Mushroom Spinach Sauce:

  1. With 5-10 minutes left of the potatoes baking: Heat remaining olive oil over medium-high heat in a large skillet. Add onions and cook about 2 minutes until slightly translucent.
  2. Add mushrooms to the skillet and cook 5-8 minutes stir occasionally until the mushrooms have released water and cooked down.
  3. Add mined garlic and white wine to the skillet. Mix everything to combine, bring to boil, and reduce heat to medium-low. Simmer 8-10 minutes until the sauce has slightly reduced.
  4. Add spinach to the skillet, slowly mix everything together as the spinach begins to wilt. After the spinach has wilted, about 5-6 minutes turn off the heat and add the yogurt to the skillet. Stir to mix in the yogurt. Divide between your cheesy potatoes. Garnish with crushed red pepper to serve.

Notes

Nutritional data is automated, final nutritional information will depend on ingredients used and any changes made.

Nutrition Information:

Yield:

4

Serving Size:

1 stuffed potato

Amount Per Serving: Calories: 483

Did you make this recipe?

Please leave a comment below on the blog or share a photo with me tag @the_schmidty_wife! Can't wait to see what you made!

© Lauren Schmidt
Cuisine: American

Peace & Love

Lauren, The Schmidty Wife

P.S. Love potatoes like my Spinach Mushroom Stuffed Baked Potatoes? Check out my Crispy Oven Roasted Baby Yukon Potatoes or my Rueben Stuffed Baked Potatoes.

Please note that my links above may be affiliate links, and I will earn a commission if you purchase through these links. I recommend them because they are helpful, and are companies that I trust, not because of the commissions that I may earn from you using these products.

Apple Bacon Blue Smothered Pork Chops

October 23, 2018 by Lauren Schmidt Leave a Comment

Pan fried Pork Chops smothered in diced apples, bacon, and blue cheese makes a quick and delicious dinner!

This post may contain Affiliate Links.

Overhead Shot of Apple Bacon Blue Smothered Pork Chops in a cast iron skillet

Smothered Pork Chops with Apples, Bacon, and Blue Cheese

To me bacon and blue cheese is one of those quintessential flavor combinations that just always will go together, whether on a wedge salad, stuffed together in chicken, or with a pork chop. The saltiness from the bacon and the tanginess from the cheese are just perfection. Now throw in a sweet apple and BOOM, Flavor Town (as Guy Fieri would say). Now I could easily stuff this flavor combo into a pork chop but why go through all that work? Introducing Apple Bacon Blue Smothered Pork Chops.

Made in one skillet this dinner is ready to go in half an hour, and packs so much flavor you won’t believe how easy it is to make. This recipe also boasts a simple list of ingredients, let’s take a look.

The Ingredients

  • Pork Chops – Go for the bone in variety (although boneless would work), the meat around the bone is usually the tastiest. Pork chops are a great weeknight dinner option, cheap, cook fast, and great tasting. These pork chops will get seared on the stove top before being transferred to the oven to finish cooking.
  • Apples – With a touch of cinnamon, diced apples bring a touch of freshness, sweetness, and fall flavor to this dish. Go with a hard variety apple so it doesn’t get too mushy while cooking, like a honey crisp of gala apple. The apple will be diced into bite size pieces then sprinkled in cinnamon Just enough cinnamon to bring flavor to the dish but not to much that it will overpower the other flavors of the dish.
  • Bacon – Topping your pork in more pork!
  • Blue Cheese – Everyones favorite mold right?! I guess I have always enjoyed blue cheese so it is hard for me to believe that some people don’t enjoy it. Even if someone “didn’t like” blue cheese they might find hard to resist in this dish. melted overtop the pork chop, it brings the perfect tang to offset the bacon and apples.
  • Balsamic Vinegar – I think one thing that is often missing from this flavor combination is a touch of acid. Just a drizzle of balsamic vinegar is that secret to this delightful dinner. That smash of acid brings in the final balance to this complexly flavor but easy to make dish.
a cast iron skillet full of 3 Apple Bacon Blue Covered Pork Chops

The Method

The bacon is cooked to crisp on the skillet. Then using residual bacon grease the pork chops are then seared on the stove top so each gets some flavorful browning. Apples are added around the pork chops and the bacon is crumbled onto the pork along with the blue cheese. A quick drizzle of balsamic vinegar and the skillet in ready for the oven. The pork finishes cooking in the the oven for about 10 minutes, the cheese gets all melty, and all of the flavors blend together.

Such a simple meal right? Apple Bacon Blue Smothered Pork Chops pair well with a simple side salad or steamed vegetables.

Apple Bacon Blue Smothered Pork Chops in a skillet with diced apples

tips, tricks and questions

I would like to note that while the recipe calls for 3 pork chops, you probably could fit 4 if you wanted, especially if they were smaller.

A cast iron pan works best for this recipe, I love my cast iron skillet, my go to is my Lodge 12 Inch Cast Iron Skillet.

I like to use my trusty meat thermometer the Thermapen from ThermoWorks for taking the temperature of my pork chops.

a pork chop in the cast iron skillet with crumbled bacon and melty cheese

If you like this Apple, Bacon, Blue Smothered Pork Chops Recipe you might also like:

  • Pork Loin Roast with Apples, Onions, & Potatoes
  • Air Fryer Pork Schnitzel
  • Quick and Easy Pork Fried Rice
  • Spicy Balsamic Crockpot Pork Loin
  • Warm German Potato Salad
Yield: 3 servings

Apple Bacon Blue Smothered Pork Chops

Overhead Shot of Apple Bacon Blue Smothered Pork Chops in a cast iron skillet

Sweet apples, salty bacon, and tangy blue cheese smothered over a baked pork chop.

Prep Time 5 minutes
Cook Time 25 minutes
Total Time 30 minutes

Ingredients

  • 3 bone-in center cut pork chops
  • 6 strips bacon
  • 2 apples, hard variety
  • 1/2 teaspoon ground cinnamon
  • 3 tablespoons blue cheese crumbles
  • 2 tablespoons balsamic vinegar

Instructions

  1. Preheat oven to 350º F.
  2. Add bacon to a large cast iron or oven proof skillet. Heat over medium-high heat to cook bacon, 5-8 minutes tossing occasionally until brown. Transfer bacon to a paper towel lined plate to cool. Once cool, crumble or chop into small pieces.
  3. While bacon is cooking, core and dice the apples. Sprinkle cinnamon over top the diced apples and toss to coat.
  4. Drain bacon grease from skillet, leaving just a little to cover the bottom of the pan. Add Pork chops to the pan. Cook 3-4 minutes until bottom is browned and flip. Add the apples to the skillet, fill in all of the free space around the pork chops with the apple. Cook another 3-4 minutes.
  5. Remove from heat, evenly sprinkle bacon pieces and blue cheese crumbles on top of the pork chops. Drizzle balsamic vinegar over the pork chops.
  6. Transfer the skillet to the oven. Cook for 10 minutes, or until pork is fully cooked and cheese is melty. Serve immediately.

Notes

Nutritional data is automated, final nutritional information will depend on ingredients used and any changes made.

Recommended Products

As an Amazon Associate and member of other affiliate programs, I earn from qualifying purchases.

  • Thermapen ONE
    Thermapen ONE
  • Lodge 12 Inch Pre-Seasoned Cast Iron Skillet
    Lodge 12 Inch Pre-Seasoned Cast Iron Skillet

Nutrition Information:

Yield:

3

Amount Per Serving: Calories: 522Total Fat: 28gSaturated Fat: 11gTrans Fat: 0gCholesterol: 127mgSodium: 941mgCarbohydrates: 25gFiber: 3gSugar: 20gProtein: 43g

Did you make this recipe?

Please leave a comment below on the blog or share a photo with me tag @the_schmidty_wife! Can't wait to see what you made!

© Lauren Schmidt
Cuisine: American / Category: Main Dishes

And make sure you are following me on TikTok, Instagram, and Pinterest, for all the latest recipes!

what to serve with this

A close up of Crispy Oven Roasted Baby Yukon Potatoes

Crispy Oven Roasted Baby Yukon Potatoes

homemade maple balsamic being pored on to Roasted Pear & Pecan Salad

Roasted Pear & Pecan Salad

Overhead view of a large white bowl full of warm balsamic brussel sprout salad with pumpkin seeds, raisins, and bacon.

Balsamic Brussel Sprout Salad

A slice of homemade apple pie on a plate showing of the apple inside and the lattice top.

Homemade Apple Pie

Quick Easy Pork Fried Rice

October 4, 2018 by Lauren Schmidt 15 Comments

With no prep and ready to eat in 30 minutes this Quick Easy Pork Fried Rice is a tasty and inexpensive meal that you’ll be making again and again.

Quick Easy Pork Fried Rice is cooked in one skillet and ready to eat in 30 minutes

This post may contain Affiliate Links.

Easy Pork Fried Rice

There isn’t a lot of things in the world that you want to be described as quick, cheap, and easy BUT weeknight dinners is one of those things! Well this Quick Easy Pork Fried Rice is champion of a quick, cheap, and easy meal.

Quick. Very quick, all ready to eat in 30 minutes. Not mention the prep time is basically nothing. Like you get cooking right away, no chopping vegetables!

Cheap. Have you ever picked up a package of small boneless pork chops and kind of squeal at the low every day price? Yeah me too. Not to mention the rest of the ingredients are all very economical, eggs, rice, frozen vegetables. When we are really paying attention to our budget this quick easy pork fried rice is always on the menu.

Easy. Did I mention no prepping or vegetable chopping. The hardest parts of this meal are cutting the pork into bite sized pieces and scrambling the eggs. A great beginner meal if you are trying to get better about cooking at home!

If you are looking for more variations of fried rice besides pork look no further try Ham and Pineapple Fried Rice or Shrimp and Chicken Fried Rice. And don’t forget to pair this fried rice with this Yum Yum Sauce, your family will thank you!

So lets break down the ingredients and see how great this quick easy pork fried rice really is.

Ingredients

The self proclaimed ‘other white meat’, pork. Always inexpensive and readily available. Pork is such a great option when you grow tired of the other lean meats (cough cough, here is looking at you chicken breast). I always make sure to cut off the fat bits to keep this dish lean.

  • Rice – I love rice. Basmati is my favorite rice to use in this dish, closely followed by jasmine rice, but ultimately any rice will work. For the best fried rice you will actually want to use day old rice if possible, if not possible try to make the rice with enough time for it to at least cool down before you cook with it. The best time to actual make the rice is probably as you are making dinner the night before, that is if you are organized enough!
  • Frozen Mixed Vegetables – All hail frozen vegetables! I feel like frozen fruits and vegetables often get the shaft, but hello they are just as healthy as fresh vegetables AND SOOO much more convenient. Nothing to me is more convenient than just dumping a whole pound of vegetables into my dinner with any chopping and usually a fraction of the price. For this recipe I use ‘mixed’ frozen veggies, the classic frozen vegetables with the corn, carrots, peas, lima beans, and beans or some variety like that.
  • Sauce – Simple and probably made of things you already have at home like soy sauce, brown sugar, ground ginger, and minced garlic. Simple right? And if I am feeling spicy (I usually am) I will either put some red pepper flakes or sriracha to mix it up. This delicious combination gets soaked up by the rice leaving each bite super flavorful.
  • Eggs – A second protein? Why yes please. If it doesn’t surprise you I think a lot about food, sometimes I like to play a game in my head called what foods I could not live without (weird maybe?). Anyways one of those foods on my ‘I could not live without’ list is eggs. So versatile and healthy, just last week I went through 50 eggs, not joking (In all fairness I did a huge meal prep that involved them) but eggs can basically go into any dish and make it better, for example fried rice!

Instructions

Another great reason for this dish is the convince of the ‘one pot’ (aka skillet). I love having one skillet, a spatula, and one knife for clean up. So besides minimal dishes this quick easy pork fried rice is also easy to make. Essentially things just get added and tossed in until done.

I start by getting a sear on the pork, I think this adds flavor to them. By getting the outsides nice and browned you get all that extra flavor that you otherwise wouldn’t get. So to start, you get the skillet nice and hot and get each side seared and browned. The pork chops will then be set aside to cool. Once cool enough to touch you’ll chop them into bite sized pieces to add back in. If your pork isn’t all the way cooked at this point, don’t fret, it is going back into the skillet to finish cooking.

Once the pork chops are seared you will add the vegetables, they are cooked for a few minutes until no longer frozen. The rice and sauce is added and tossed, followed by the pork.

vegetables and rice being tossed in the skillet
Pork being added to the skillet
Vegetables, Rice, and Pork in the skillet

Everything thing will continue to cook and develop flavor and then the eggs will get scrambled in. To get a good scramble on the eggs you will start by making a hole in the middle of the rice. The eggs will get cracked into that middle and you will start scrambling them, as they cook you will gently add more and more of the fried rice into the egg until the egg is almost all the way cooked and you will toss it all together.

Making a hole for the eggs to scramble
The eggs in the hole to be scrambled into the fried rice

And boom, dinner is ready. OR meal prep, this is great quick option you can make ahead for lunches for the week. You can divide this out into containers and have it ready to take with you all week. Fast simple and easy, you’ll be rolling your eyes at everyone else paying $10 for lunch!

Quick Easy Pork Fried Rice in a skillet

tips, tricks and questions

Day old rice is best in this dish, if you have enough foresight try to make the rice the night before (if not don’t fret, it will still taste good)

When I have a little extra time I will also add an onion to this dish, I sauté it until translucent after I sear the pork and before I add the vegetables

Pro tip: I use this dish as a great way to use either unused egg whites or egg yolks. So when a dish or baked good calls just for egg yolks (or vice versa) I’ll save the other part of the egg and just use that in this dish. For example when I make my Summer Spaghetti Carbonara I save the unused egg whites and make this dish the next night with them.

A meal prep container full of Quick Easy Pork Fried Rice

If you like this Pork Fried Rice Recipe you might also like:

  • Shrimp Stir Fry
  • Korean Ground Turkey & Rice Bowls
  • 20 Minute Chicken Stir Fry
  • One-Pot Teriyaki Noodles
  • Ground Pork Stir Fry
Yield: 4 servings

Quick Easy Pork Fried Rice

Quick Easy Pork Fried Rice is cooked in one skillet and ready to eat in 30 minutes

a no prep fried rice full of healthy wholesome ingredients ready to eat in 30 minutes

Active Time 30 minutes
Total Time 30 minutes

Ingredients

  • 2 cups cooked rice*
  • 1 pound boneless center cut pork chops
  • 1 16oz bag frozen mixed vegetables
  • 1/2 cup soy sauce
  • 1 tablespoon brown sugar
  • 1/4 teaspoon ground ginger
  • 1 teaspoon minced garlic
  • 3 eggs

Instructions

  1. Heat a lightly greased large skillet over medium-high heat on the stovetop. Add pork chops, cook for 3-4 minutes until brown. Flip and cook the other side 3-4 minutes until brown. Remove pork from skillet and set aside and let cool to touch. Chop into bite sized pieces. (If your pork chops are not fully cooked at this point don't fret they will finish cooking when they are added back to the skillet.
  2. While pork in cooking add soy sauce, brown sugar, ground ginger, and minced garlic to a small bowl. Mix together to form the sauce.
  3. Add the frozen vegetables to the hot skillet. Cook 2-3 minutes until they are no longer frozen solid.
  4. Add rice and sauce to the skillet. Toss to combine. Add pork back to skillet, toss to combine. Cook for 5-6 minutes stirring approximately every minute until pork is fully cooked and the rice has soaked up all of the sauce.
  5. Move the rice to the outside edge of the skillet forming a hole in the middle of the skillet. Crack the eggs into the hole. Scramble the eggs in the hole (a rubber spatula works best for this), as they begin to cook start pulling in rice from the side. Continue combining the scrambled eggs and rice until fully combined.
  6. Remove from heat and serve immediately or keep in an airtight container in the refrigerator.

Notes

*1 cup uncooked rice. Basmati or Jasmine work best, although any kind will work. Day old rice or leftover rice work best in this recipe.

Nutritional data is automated, final nutritional information will depend on ingredients used and any changes made.

Nutrition Information:

Yield:

4

Serving Size:


Amount Per Serving: Calories: 358Total Fat: 8gCholesterol: 195mgSodium: 2106mgCarbohydrates: 36gFiber: 2gSugar: 6gProtein: 31g

Did you make this recipe?

Please leave a comment below on the blog or share a photo with me tag @the_schmidty_wife! Can't wait to see what you made!

© Lauren Schmidt
Cuisine: Asian / Category: Main Dishes

And make sure you are following me on TikTok, Instagram, and Pinterest, for all the latest recipes!

How To Grill Chicken Breasts with Barbecue Sauce

August 28, 2018 by Lauren Schmidt Leave a Comment

This post may contain Affiliate Links.

The Best Grilled Chicken - How To Grill Chicken Breasts with Barbecue Sauce

Today we are doing more of a ‘how to’ on The Schmidty Wife, opposed to a recipe. How To Grill Chicken Breasts with Barbecue Sauce.

Over the month of July I took the time to write down what we had for dinner every night. With the intention of sharing what I feed my family most often with my readers. Well turns out this summer was pretty predictable with some simple barbecue grilled chicken. I turn to the grill most of the time during the summer so it is no surprise to me that we had this for dinner the most often. So let’s talk about how to grill chicken breasts with barbecue sauce.

It’s all about the grill and the chicken breast today. Now if you know me you know I’d take a chicken thigh over a breast any day but there is also something so deliciously basic about a barbecued chicken breast on the grill, when done right I can barely resist it.

So often chicken breasts can be overcooked and dried out which makes them no good. It can also be tricky to realize when to add the sauce during grilling. So today we are going to go over some of the basics of How To Grill Chicken Breasts with Barbecue Sauce.

The Chicken

I read somewhere that almost 40% of millennials are afraid to touch raw chicken. Seriously you guys?!? It won’t bite you! In all fairness yes if you aren’t handling it properly and cross contaminating then you get get sick, in a majorly bad way. But it’s not that hard to keep a clean safe environment.

First, don’t cross contaminate. I have a glass cutting board I use specifically and only for raw meats. I chose glass because it is super easy to clean up and dishwasher safe. I only let my raw meats touch that board and nothing else. I also do not share knives between my raw meats and anything else in the same session unless 2 things happen, that knife was washed super well, or I am 100% done cutting other things and my raw meat is the only thing left to cut. Never cut raw meat and immediately cut vegetables (or whatever else you need to cut), I feel like that is common sense but I am going to say it any way.

Second, wash hands. I feel like this probably should have been first, but whatever. Wash your hands before and immediately after handling raw meats. If you are really really scared of touching raw meat get over yourself buy some disposable gloves.

Its basically that simple, keep it clean.

Why do you need to touch the raw chicken? Because grilled chicken it so much better as a cutlet.

So Let’s talk how to prepare the chicken cutlet.

A chicken cutlet is basically just a fancy word for cutting your large chicken breast in half. You can cut it in half yourself so easily (or you can also buy cutlets at the store).

In a clean space, butterfly cut your chicken breast in half and voila you are ready for the grill.

process shots of a chicken breast being cut into a cutlet

So I have two reasons why I love grilling a cutlet opposed to a whole breast. First, it tastes better. I find that a whole chicken breast tends to cook unevenly and can either appear rubbery or dried out. With the cutlet, the pieces are more uniform giving it a more even cook. Second, they cook so much faster. Like half the time of a full chicken breast, so dinner is to your family faster.

The Grilling

I love grilling. I don’t talk about it enough on the blog. There is something about grilling that takes you back to a simpler time, like food and fire, a little bit back to nature if you will. Plus because we choose to live where there is 2 feet of snow on the grill for months at a time I like to take advantage of it when I can.

You will want to bring your grill to a medium-high heat. The chicken will go over direct heat for in total about 10 minutes. I would like to note that each grill is going to be a little different, especially charcoal vs gas, so ultimately you’ll want to go for as long as it takes to reach an internal temperature of 165º F.

To get the barbecue sauce cooked nicely on the chicken this is how you cook it. Lightly oil the chicken and give each piece of dash of salt and pepper. (P.S. I’ve become obsessed with this Cooking Spray Oil this summer, I just give each side a light spray, so easy). Place the oiled chicken over direct heat. Cook 4 minutes. Flip chicken, immediately drizzle and brush cooked side of chicken with barbecue sauce, cook 4 minutes. Flip chicken again so that the barbecued side is now on the grill, immediately drizzle and brush the second side with barbecue sauce, cook 1 minute. Flip chicken one last time, cook an additional 1 minute or until chicken has reached an internal temperature of 165º F.

Remove chicken from grill and cover with aluminum foil for 3-5 minutes. Serve with extra sauce on the side if desired.

So that is How To Grill Chicken Breasts with Barbecue Sauce. It is quick and easy making it the perfect meal to feed your family (especially during summer). So don’t over think dinner and get grilling now!

Chicken breasts on a charcoal grill
Barbecue being brushed onto a chicken breast on the grill
Grilled Chicken Breasts with Barbecue Sauce

TIPS & TRICKS:

• I know I just talked a lot about cutting your chicken BUT you can also buy cutlets at the grocery store, look for cutlets that are 6-8oz each

• Use whatever barbecue sauce or any other of your favorite sauces using this method (like buffalo sauce)

Yield: 4 servings

How To Grill Chicken Breasts with Barbecue Sauce

How To Grill Chicken Breasts with Barbecue Sauce

an easy way to grill a perfect barbecue chicken breast

Prep Time 10 minutes
Cook Time 10 minutes
Total Time 20 minutes

Ingredients

  • ~2 pounds chicken breast (2 large breasts or 4 cutlets*)
  • your favorite barbecue sauce

Instructions

  1. Preheat grill to medium-high heat.

On a clean surface cut large chicken breasts horizontally to create two cutlets.

Lightly oil the chicken and give each piece of dash of salt and pepper.

Place the oiled chicken over direct heat. Cook 4 minutes.

Flip chicken, immediately drizzle and brush cooked side of chicken with barbecue sauce, cook and additional 4 minutes.

Flip chicken again so that the barbecued side is now on the grill, immediately drizzle and brush the second side with barbecue sauce, cook 1 minute.

Flip chicken one last time, cook an additional 1 minute or until chicken has reached an internal temperature of 165º F.

Remove chicken from grill and cover with aluminum foil for 3-5 minutes. Serve with extra sauce on the side if desired.

Notes

*You want each cutlet to be 6-8 ounces

Nutritional data is automated, final nutritional information will depend on ingredients used and any changes made.

Nutrition Information:

Yield:

4

Amount Per Serving: Calories: 319Total Fat: 2gSaturated Fat: 1gSodium: 437mgCarbohydrates: 17gFiber: 0gSugar: 16gProtein: 52g

Did you make this recipe?

Please leave a comment below on the blog or share a photo with me tag @the_schmidty_wife! Can't wait to see what you made!

© Lauren Schmidt
Cuisine: American / Category: Grill

Peace & Love

Lauren, The Schmidty Wife

P.S. Looking for more grilling options like How To Grill Chicken Breasts with Barbecue Sauce? Check out my Pineapple Chicken Kabobs or my Prosciutto Pesto Burger.

  • Previous
  • 1
  • 2
  • 3
  • 4
  • Next

i’m lauren

Welcome to my food blog, The Schmidty Wife. I’m all about making Real Fresh Food for Real Fun Families. Here you can find delicious recipes to bring the family together at the table. My recipes are for any home cook, they focus on real ingredients that people are familiar with. From crockpot meals, to easy chicken recipes, fun pizzas, and drinks everyone will find something to love!

More About Lauren

  • Facebook
  • Instagram
  • Pinterest
  • Twitter

sign up for 5 days of meals

Get 5 days of fresh dinner plans for free,
straight to your inbox!

    latest recipes

    A stack of lemon blueberry pancakes with syrup pouring over the top.

    Lemon Blueberry Pancakes

    A wine glass filled with ice and Watermelon Aperol Spritz with a watermelon wedge.

    Watermelon Aperol Spritz

    Bowl with dense white bean salad and grilled chicken garnished with parsley.

    Dense White Bean Salad

    A plate with golden brown and crispy chickpea fritters, fresh parsley, and lemon slices.

    Easy Chickpea Fritters

    spring recipes

    A stack of lemon blueberry pancakes with syrup pouring over the top.

    Lemon Blueberry Pancakes

    A grilled buffalo chicken sandwich with blue cheese coleslaw on a white plate next to some chips.

    Grilled Buffalo Chicken Sandwich

    Whiskey glasses on a table filled with ice and Irish Lemonades, garnished with lemon peel and mint leaves.

    Irish Lemonade

    A platter of grilled artichokes with a half of an artichoke on top showing off charred grill marks.

    Grilled Artichokes Recipe

    More Spring Recipes

    Browse by Category

    • Appetizers
    • Breakfast
    • Desserts
    • Drinks
    • Main Dishes
    • Side Dishes

    Browse by Protein

    • Chicken
    • Beef
    • Turkey
    • Pork
    • Meatless
    • Seafood

    never miss a new recipe

      • Instagram
      • Pinterest
      • TikTok

      2022 © The Schmidty Wife Privacy Policy Site Credits
      Back to Top